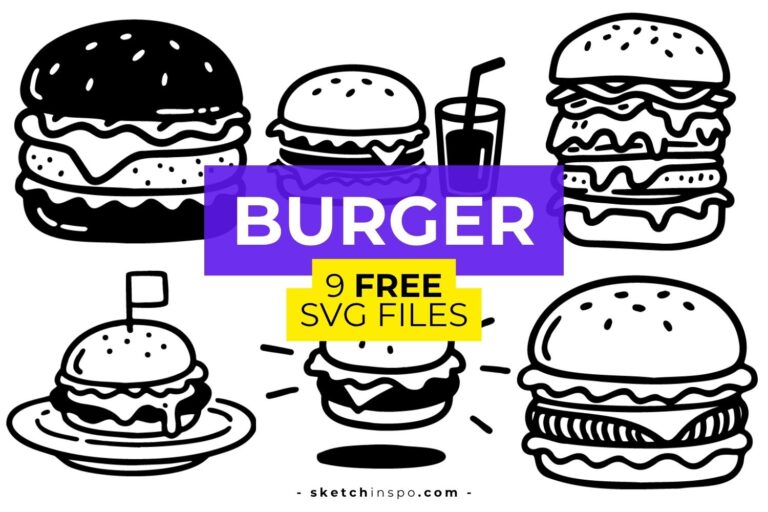
How to Draw a Burger: A Simple Step-by-Step Guide
Want to learn how to draw a burger without getting tangled in complicated shapes and annoying details? Grab a pencil, and let’s build a delicious-looking burger one layer at a time. You don’t need fancy art supplies or years of practice—just a little patience and a willingness to draw something that might make you hungry. 🍔
I love drawing food because simple shapes can create surprisingly fun results. A burger gives you plenty of room to practice curves, layering, texture, and color without making the process feel like a serious art exam. So, are you ready to create your own tasty-looking masterpiece? Let’s get started!
What You Need to Draw a Burger
Before you start, gather a few basic supplies. You can keep things simple because you don’t need an entire professional art studio for one burger. Unless you really want to organize your pencils by emotional support level, of course.
You’ll need:
- A pencil for sketching
- An eraser for quick corrections
- A black pen or marker for outlining
- Colored pencils, markers, or crayons
- A sheet of paper
For beginners, I recommend starting with a light pencil sketch. A light sketch lets you adjust the shape before you commit to darker lines. IMO, that small habit makes drawing much less stressful.
When you learn how to draw a burger step by step, focus on the overall shape first. Don’t worry about perfect details right away. A burger consists of simple layers, and each layer helps you build the final drawing.
Step 1. Draw the Bottom Bun
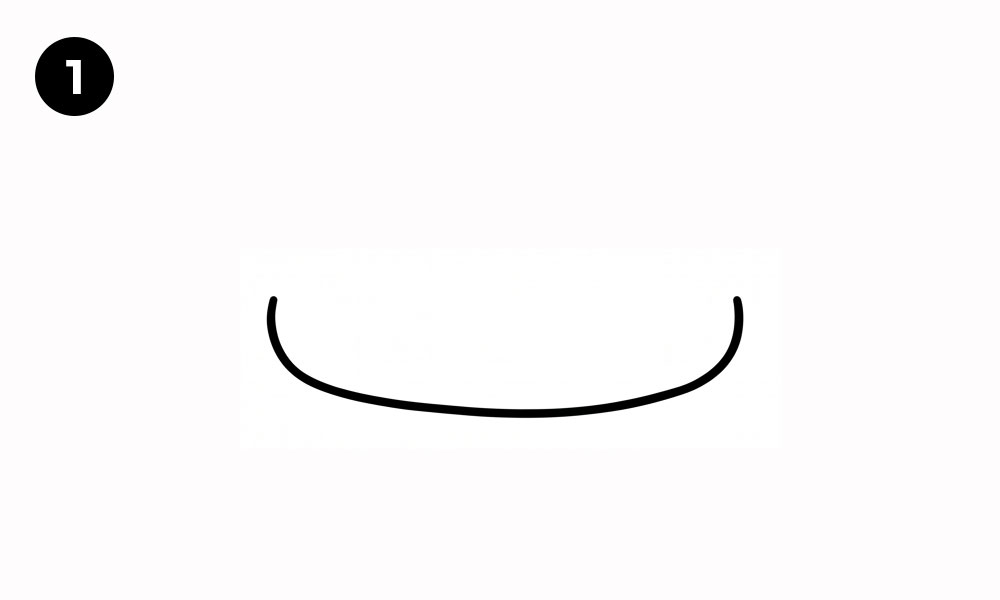
Start your burger drawing with the bottom bun. Think of it as a wide, slightly curved shape that supports every delicious layer above it.
Draw a long, shallow curve that rises slightly in the middle and curves down toward both sides. Then, add the lower edge of the bun with another curved line. Keep the shape rounded rather than perfectly straight.
Tips for Drawing the Bottom Bun
Try to make the bottom bun slightly wider than the layers you plan to add later. That extra width gives your burger a more natural appearance.
Keep these tips in mind:
- Use smooth curved lines instead of sharp corners.
- Make the bun wide enough to support the burger.
- Keep the top edge fairly flat so the lettuce can sit on it.
- Avoid making the bun too tall at this stage.
Why start with the bottom bun? It gives you a clear foundation and helps you position every other ingredient. If the base looks balanced, the rest of the burger usually comes together much more easily.
Don’t worry if your first curve looks a little uneven. Real burgers rarely look perfectly symmetrical anyway. In fact, a slightly imperfect shape can make your drawing feel more natural.
Step 2. Add the Lettuce
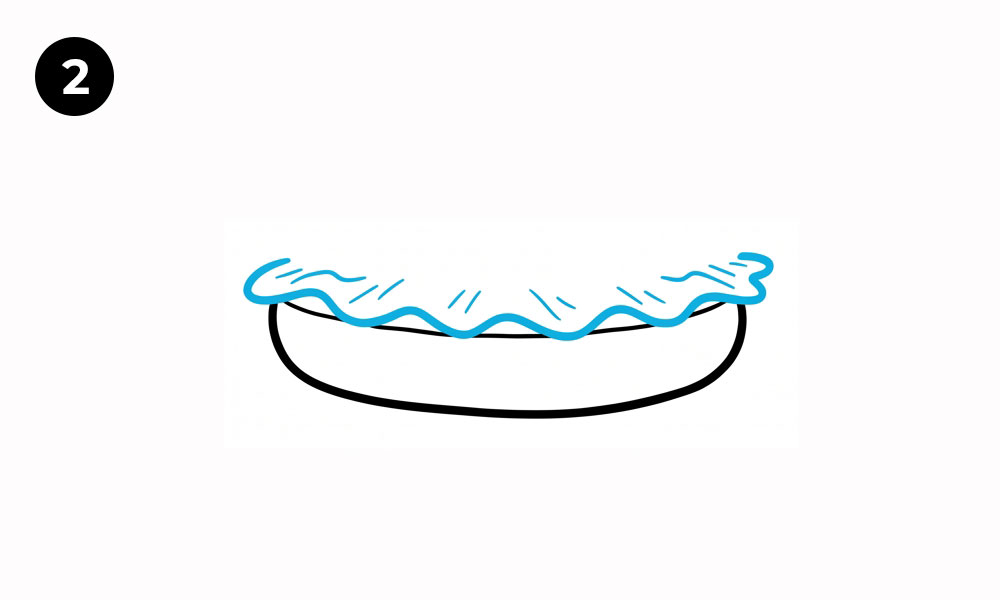
Now let’s add some lettuce. This layer gives your burger a fun, wavy texture and breaks up the smooth shapes of the bun.
Draw a series of loose, wavy lines across the top of the bottom bun. Let some parts of the lettuce extend slightly beyond the bun’s edges. Those little leafy edges add personality to your burger drawing.
How to Make the Lettuce Look Natural
Avoid drawing the lettuce as one perfectly smooth line. Real lettuce has plenty of ruffles, folds, and irregular edges.
Try this approach:
- Draw gentle waves across the top.
- Add a few pointed or folded edges.
- Let small sections hang over the bun.
- Vary the height of the waves.
Have you noticed how a few irregular lines can instantly make a drawing look more realistic? That trick works especially well with food illustrations.
At this point, your burger should already start to look like a burger. If it looks more like a strange green blanket, don’t panic. Add the patty next, and everything will make much more sense. 🙂
Step 3. Draw the Burger Patty
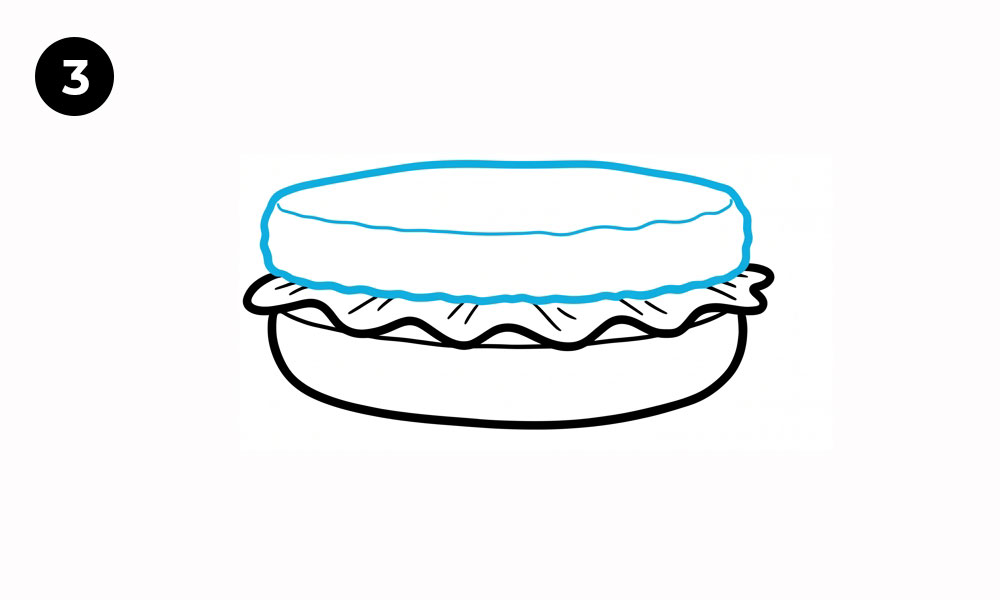
Next, add the burger patty above the lettuce. This layer gives your drawing its main body and creates a strong contrast between the green lettuce and the brown meat.
Start by drawing a wide, rounded shape that follows the general width of the bun. Give the patty slightly uneven edges to create a more natural look.
A perfectly smooth patty can look a little too clean. Unless you’re drawing a burger from a laboratory, a few small bumps and irregular edges will make the illustration feel more believable.
Add Texture to the Patty
You can add a few short, curved marks across the patty to suggest texture. Keep the marks subtle because too many lines can make the patty look confusing.
Use:
- Small curved strokes
- Tiny irregular marks
- Short lines near the edges
- A few darker details for texture
Simple texture works better than excessive detail when you create a beginner-friendly burger drawing. You want the patty to look textured, not like someone attacked it with a pencil.
Pay attention to the width of the patty as you draw. Try to keep it slightly inside the edges of the bun and lettuce so the layers remain easy to recognize.
Step 4. Add the Cheese
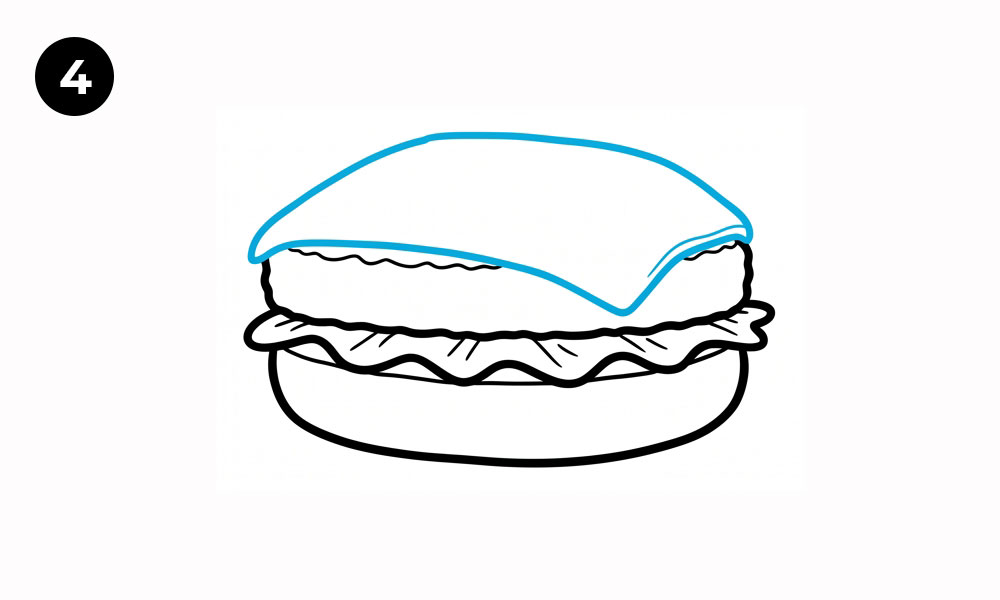
Now comes one of my favorite parts: the cheese. A burger without cheese can still work, but a slice of melted cheese instantly makes the drawing look more delicious.
Place the cheese directly above the patty. Draw a thin, slightly uneven layer that follows the shape of the burger. Let the corners hang down a little over the sides.
How to Draw Melted Cheese
The key lies in the edges. Instead of drawing a perfectly straight square, create a few soft curves and pointed corners.
Try to:
- Make the cheese slightly wider than the patty.
- Let one or two corners droop over the edge.
- Add gentle curves to show melted sections.
- Keep the cheese layer relatively thin.
Why does melted cheese look so fun to draw? The irregular shape adds movement to an otherwise stacked and symmetrical burger.
You can also add a few simple lines to suggest folds. Keep the details light, especially if you want a clean easy burger drawing.
Step 5. Draw the Top Bun
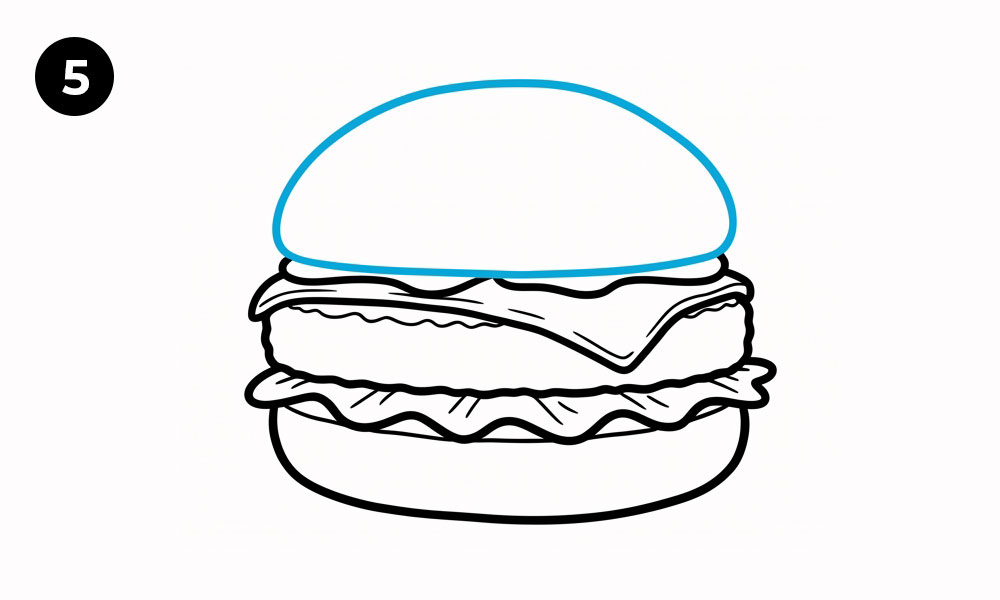
Now it’s time to finish the main structure with the top bun. This step creates the recognizable burger shape that everyone expects.
Start with a large, rounded dome above the cheese. The top bun should rise higher in the center and curve down toward both sides.
Create a Rounded Bun Shape
Use a smooth arch for the top. Then, connect the sides to the lower edge of the bun.
For a more natural shape:
- Make the top bun wider than the patty.
- Create a gentle dome instead of a sharp arch.
- Keep the lower edge slightly curved.
- Avoid making both sides perfectly identical.
Symmetry can help, but perfect symmetry can also make your drawing look stiff. I usually prefer a little variation because it gives the burger more character.
At this stage, your how to draw a burger project should clearly resemble a complete burger, even before you add the final details. Pretty satisfying, right?
Step 6. Add the Sesame Seeds
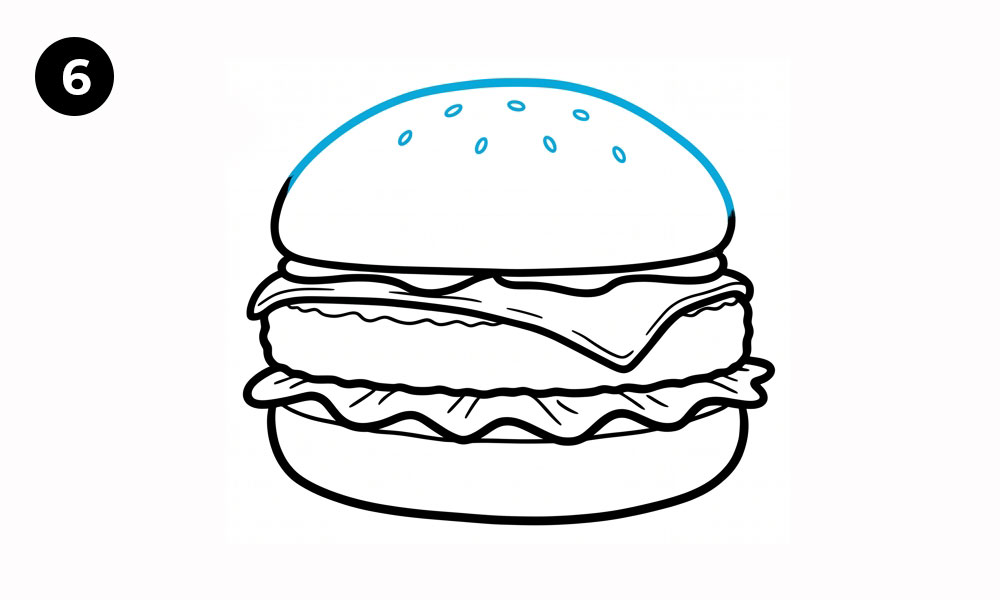
Now let’s add the tiny details that make the top bun instantly recognizable: sesame seeds.
Draw several small oval shapes across the surface of the bun. You don’t need to cover every inch of the top. A few well-spaced seeds can create the right effect.
Tips for Drawing Sesame Seeds
Try to vary the placement and angle of each seed. Real sesame seeds rarely line up in perfect rows, so avoid creating a pattern that looks too mechanical.
You can:
- Draw small ovals.
- Tilt some seeds slightly.
- Vary the sizes a little.
- Leave some open space between them.
Small details can make a big difference in a simple food drawing. The sesame seeds add texture without requiring complicated shading.
FYI, you don’t need to draw dozens of seeds. A handful of well-placed shapes can make the bun look complete. More detail doesn’t always mean a better drawing.
Step 7. Color Your Burger
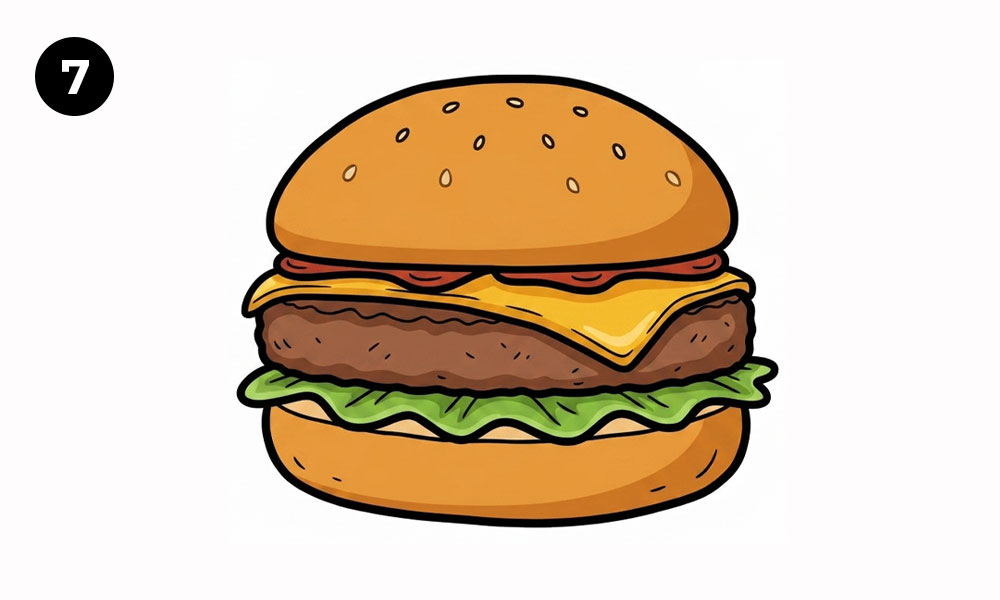
Now comes the best part: coloring your burger drawing.
Choose warm, appetizing colors for each layer. You can follow realistic colors, or you can experiment with your own creative style.
Here’s a simple color guide:
- Top and bottom buns: golden brown or orange-brown
- Lettuce: bright or medium green
- Burger patty: dark brown
- Cheese: yellow or golden yellow
- Sesame seeds: cream or light beige
Add Simple Shading
You can make the burger look more dimensional by adding slightly darker shades along the edges and underneath each layer.
For example:
- Add darker brown near the lower edge of the bun.
- Use deeper green beneath the lettuce folds.
- Add darker marks to the patty for texture.
- Use orange or golden shades around the cheese edges.
You don’t need advanced shading techniques. Simple color variation can add plenty of depth to a beginner drawing.
If you use colored pencils, apply light layers first and gradually build the color. If you use markers, choose a darker shade for small shadows. Crayons work well too, especially for younger artists who want a bold and colorful result.
How to Make Your Burger Drawing Look Better
Once you finish the basic drawing, you can improve it with a few simple adjustments. You don’t need to redraw the entire burger or add a ridiculous number of details.
Focus on these areas:
Improve the Layering
Make sure each ingredient overlaps the layer below it slightly. This overlap creates a stacked appearance and helps the burger feel more three-dimensional.
For example, the cheese should sit over the patty, while the top bun should sit over the cheese. Small overlaps create a much stronger sense of depth.
Add More Texture
You can add a few extra details to make the ingredients more interesting:
- Small marks on the patty
- Fold lines on the cheese
- Short lines on the bun
- Extra curves in the lettuce
- Slight shadows between the layers
Remember, a few intentional details work better than random lines everywhere. Your burger doesn’t need to look like a forensic investigation.
Experiment With Different Burger Styles
Once you understand the basic structure, you can create all kinds of burger drawings.
Try adding:
- Tomato slices
- Pickles
- Onions
- Extra cheese
- Bacon
- A double patty
- A veggie patty
What kind of burger would you create if you could build one without worrying about gravity? A towering double cheeseburger? A ridiculous burger with five layers? Go for it!
Common Mistakes When Learning How to Draw a Burger
Beginners often make a few predictable mistakes when drawing stacked food. Luckily, you can fix most of them easily.
Making Every Layer the Same Width
A burger looks more natural when the layers have slight differences in width. Let the bun extend beyond the patty, and allow the lettuce or cheese to stick out in a few places.
Using Only Straight Lines
Straight lines can make your burger look flat and stiff. Use curved and wavy lines to create softer, more natural shapes.
Adding Too Much Detail Too Soon
Many beginners start with tiny details before they establish the main shape. That approach can create a messy drawing.
Instead, follow this order:
- Sketch the main shapes.
- Build the burger layers.
- Add texture.
- Outline the drawing.
- Add color and shading.
This method keeps the drawing organized and makes corrections much easier.
Easy Burger Drawing Ideas for More Practice
Once you finish this tutorial, don’t stop with one burger. Practice helps you understand shapes and proportions much faster.
Try drawing:
- A cheeseburger with extra cheese
- A double burger
- A mini slider
- A veggie burger
- A burger with fries
- A burger on a plate
- A cartoon burger with exaggerated layers
You can also change the perspective. Try drawing a burger from the side, at a slight angle, or from above.
Want an easy challenge? Draw the same burger three times and change one ingredient each time. Add bacon to one, extra cheese to another, and a giant lettuce layer to the last one. You’ll quickly see how small changes create completely different drawings.
Final Thoughts on How to Draw a Burger
Learning how to draw a burger doesn’t require complicated techniques. You can create a fun and recognizable burger by building the drawing layer by layer.
Start with the bottom bun, add the lettuce and patty, place the cheese on top, and finish the structure with the top bun. Then add sesame seeds, color each ingredient, and use a few simple details to give the drawing extra personality.
The biggest tip? Don’t chase perfection too early. Focus on the shapes, enjoy the process, and let your drawing develop naturally.
So grab your pencil and try your own version. And if your first burger looks a little wonky, remember: the best part about drawing food involves one major advantage over cooking—you can erase the evidence. 🍔