How To Draw an Apple
Want to learn how to draw an apple without getting stuck on complicated shapes, confusing proportions, or a sketch that somehow looks more like a lumpy tomato? Good news: you can draw a simple apple with a few easy lines and a little patience.
I love simple drawing tutorials because they prove one thing: you don’t need fancy art supplies to create something that looks great.
A pencil, some paper, and a willingness to erase a few wobbly lines can take you surprisingly far. In this guide, I’ll walk you through how to draw an apple step by step, from the first curve to the final splash of color.
Grab your pencil and let’s get started. Ready to make an apple? 🍎
What You Need to Draw an Apple
Before you start, gather a few basic supplies. You don’t need an expensive artist setup or a desk covered in mysterious professional tools.
You can use:
- A pencil or black drawing pen
- A sheet of paper
- An eraser
- Colored pencils, crayons, or markers
- A black outline pen for the final details
A regular pencil works perfectly for beginners. You can sketch lightly, adjust your shape, and erase any lines that wander off in the wrong direction. Trust me, even experienced artists create lines that suddenly decide to go on their own little adventure.
If you want a clean cartoon-style apple, use a smooth black outline and simple colors. If you prefer a more realistic apple drawing, you can add shading later.
Step 1. Draw the First Curve
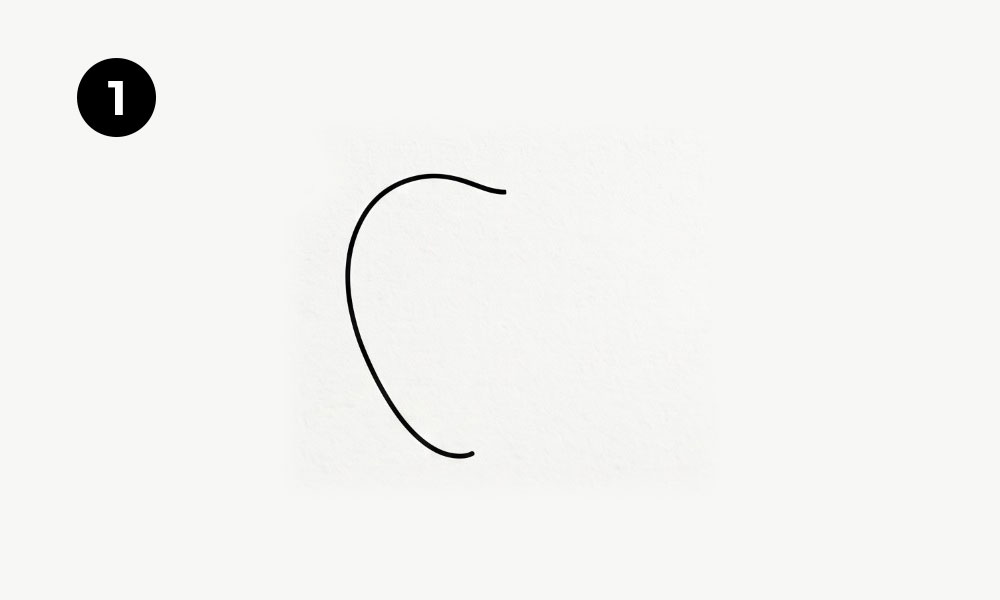
Start your apple drawing with one large curved line. Begin near the upper-left area of the apple and curve downward toward the bottom.
Think of this line as one side of the apple’s body. Keep your pencil pressure light so you can easily adjust the shape if you need to.
Don’t worry about creating a perfect curve right away. Apples rarely grow with perfectly symmetrical sides, so a little natural unevenness can actually make your drawing look more interesting.
Keep the Curve Smooth
Try to create one continuous, rounded movement with your pencil. Avoid sharp corners because an apple needs a soft, organic shape.
Ask yourself: does the line feel round and full? If it looks too flat, widen the curve slightly. If it looks too narrow, gently extend the shape outward.
Your first curve creates the foundation for the entire apple, so take your time here. A strong foundation makes the next steps much easier.
Step 2. Complete the Apple Outline
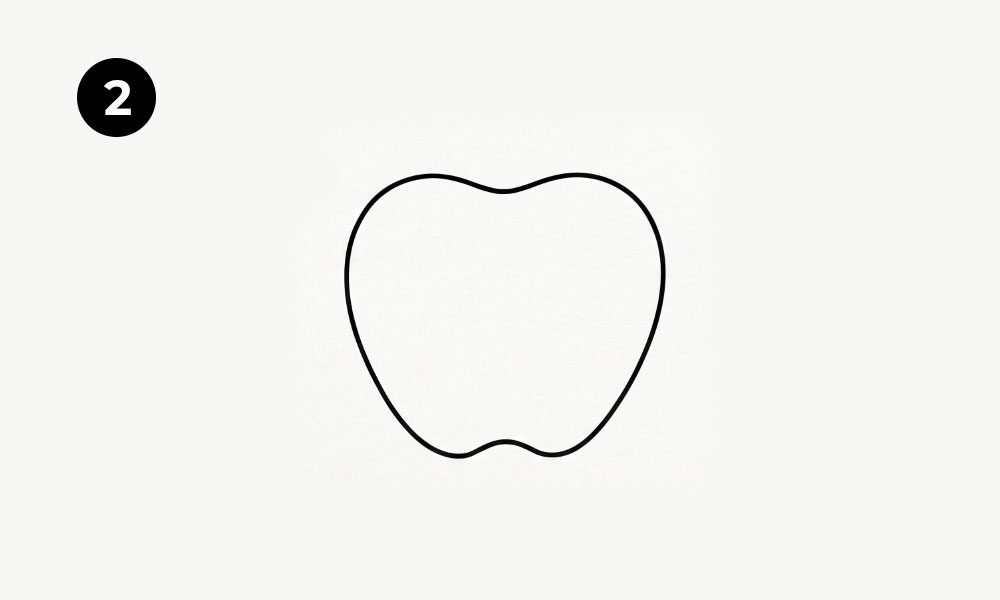
Now connect the curve around the other side to create the complete apple shape.
The apple should look rounded and slightly wider around the middle. You can create a gentle dip near the top and a soft, uneven curve at the bottom.
Don’t force both sides to match perfectly. A simple apple drawing looks more natural when the shape has small variations. Perfect symmetry can make your apple look a little too geometric, and nobody asked an apple to look like a traffic sign. 🙂
Focus on the Overall Shape
At this stage, step back and look at your outline.
Does your apple look:
- Rounded rather than square?
- Wider in the middle?
- Slightly narrower near the top?
- Soft and curved around the bottom?
If the answer feels like “yes,” you’re on the right track.
If you notice a section that looks too flat or uneven, erase that small area and redraw it. You don’t need to erase the entire apple and start over. Small corrections can make a big difference.
Step 3. Add the Top Indentation
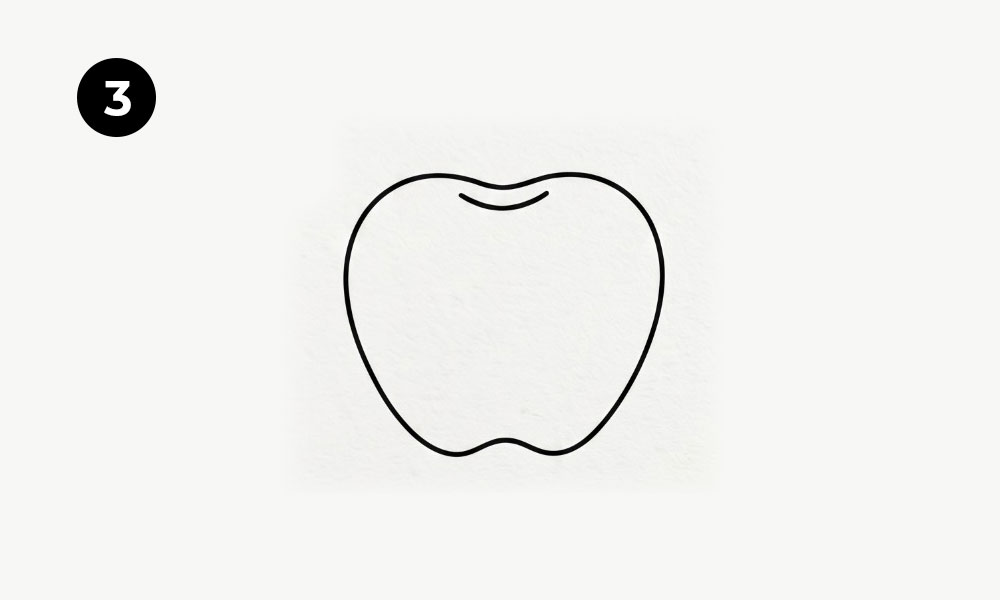
Real apples usually have a small dip where the stem grows. Now you can add that detail to make your drawing look much more like an apple.
Draw a short, curved line near the top center of the apple. This line should create a gentle indentation rather than a deep hole.
Make the Dip Look Natural
Keep the curve soft and shallow. A small smile-shaped line works well for a simple cartoon apple.
You can experiment with the depth of the indentation depending on your drawing style. A deeper dip creates a more dramatic shape, while a shallow curve creates a simple and cute apple illustration.
This small detail adds a surprising amount of character. Ever notice how one tiny line can suddenly make a basic shape look recognizable? Drawing loves those little tricks.
Step 4. Draw the Stem
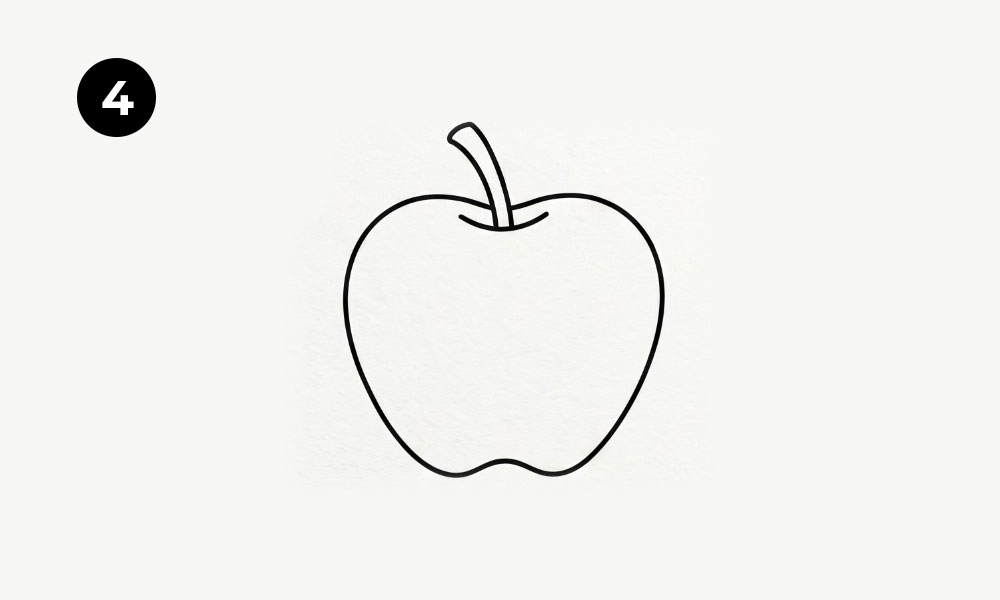
Next, add the apple stem.
Start the stem from the indentation at the top of the apple and extend it upward. You can angle the stem slightly to one side instead of drawing it perfectly straight.
A slightly curved stem often creates a more natural look. Use two curved lines to create the stem’s width, then connect the top with a small rounded edge.
Give the Stem Some Personality
You can make your stem:
- Short and thick
- Tall and narrow
- Slightly curved
- Angled to the left or right
For a beginner-friendly apple drawing, I recommend a simple curved stem. It keeps the drawing clean and makes the apple easy to recognize.
FYI, you don’t need to add complicated bark texture here. A clean outline already does the job.
Step 5. Add the Leaf
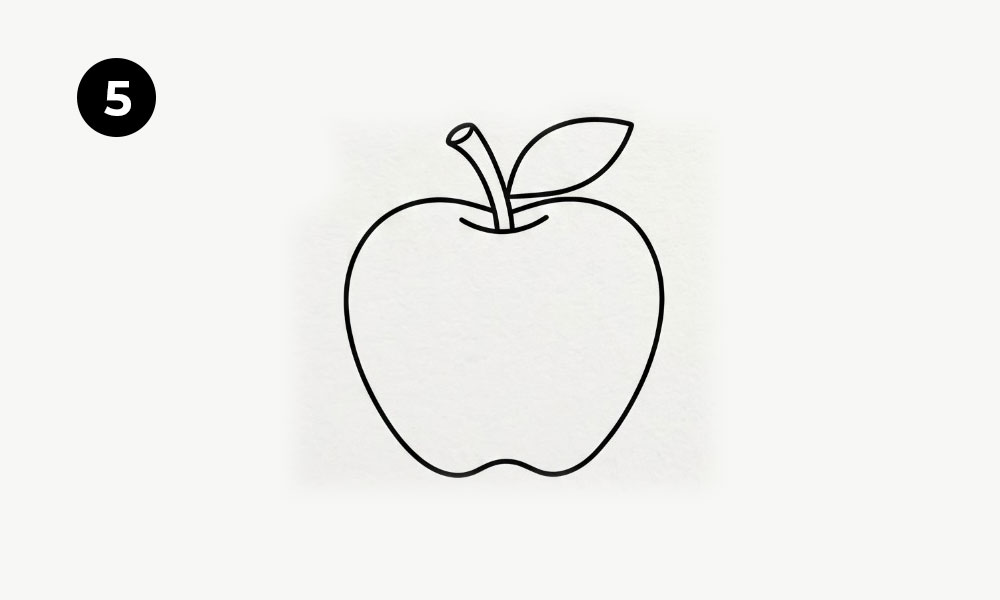
Now your apple needs a leaf. A stem without a leaf can still look fine, but adding one gives your drawing extra detail and personality.
Start the leaf near the stem. Extend one curved line outward to create the top edge of the leaf. Then bring another curved line back toward the stem to create the bottom edge.
Shape the Leaf Like a Simple Almond
The leaf should have a pointed tip and a rounded middle.
Try to create:
- A pointed end
- A wider center
- A narrow base near the stem
Keep the leaf slightly curved instead of making it look perfectly flat. A gentle curve gives the drawing more movement.
You can position the leaf on either side of the stem. IMO, a leaf angled slightly upward creates a cheerful look, while a leaf angled sideways creates a more relaxed style.
Step 6. Draw the Leaf Veins
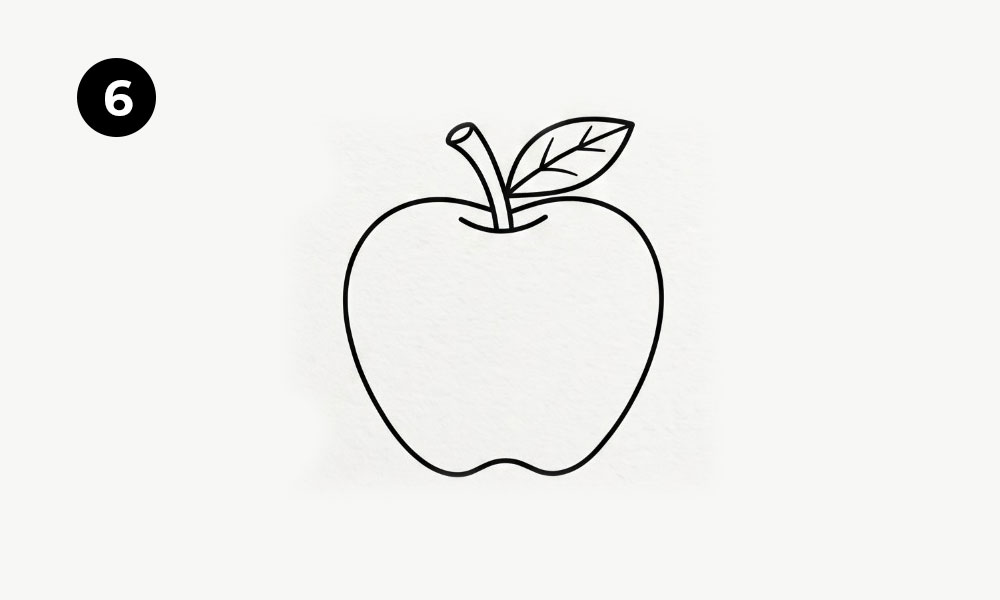
Your leaf already looks good, but a few simple lines can add much more detail.
Start by drawing one main vein from the base of the leaf toward the pointed tip. Then add a few smaller diagonal lines branching away from the central vein.
Keep the Veins Simple
You don’t need to fill the leaf with dozens of tiny lines. A few clean veins create enough detail for a simple apple drawing.
Try adding two or three smaller lines on each side of the central vein. Keep them short and slightly curved.
If you want a more cartoon-style illustration, use fewer veins. If you want a more detailed drawing, add a few extra branches.
The key lies in balance. Too few details can make the leaf look empty, while too many can make it look like you accidentally drew a tiny road map. :/
Step 7. Color Your Apple
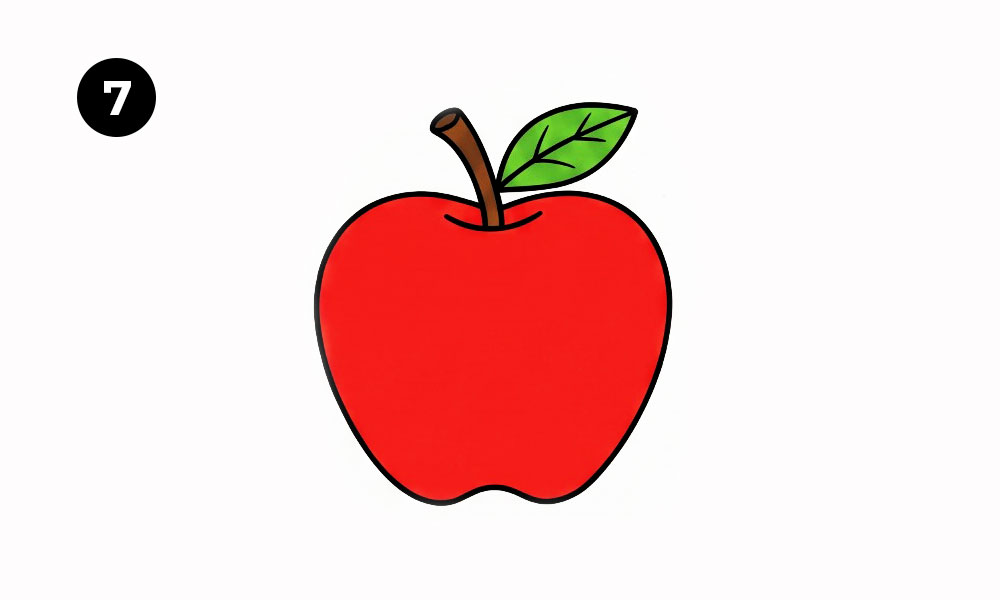
Now comes the fun part: coloring your apple.
For a classic red apple, color the main body with a bright red shade. Add brown to the stem and green to the leaf.
You can use:
- Red for a traditional apple
- Green for a fresh green apple
- Yellow for a golden apple
- Red and yellow together for a warm, realistic look
Add Simple Shading
If you want your apple to look more three-dimensional, add a darker shade along one side or near the bottom.
For example, you can:
- Use a darker red around the lower edge
- Add a little shading beneath the leaf
- Leave a small white area as a highlight
- Blend two shades gently together
Simple shading can transform a flat apple into a more realistic apple drawing. You don’t need advanced blending techniques to create this effect.
Start with light layers and gradually build the color. This approach gives you more control and helps you avoid creating a giant dark patch that takes over the entire apple.
Tips for Drawing a Better Apple
Once you finish your first apple, try drawing it again. Yes, I know—drawing the same thing twice sounds suspiciously like homework. But repetition helps you understand the shape much faster.
Here are a few tips that can improve your results:
Use Light Sketch Lines
Start lightly with your pencil. Light lines make corrections easier and help you build the shape without feeling pressured.
Avoid Perfect Symmetry
Apples naturally have small differences from one side to the other. Let your drawing show a little personality.
Use Simple Shapes
You can think of an apple as a rounded shape with a small dip at the top. Breaking the subject into simple parts makes how to draw an apple much easier for beginners.
Practice Different Apple Shapes
Try drawing apples that look:
- Tall and narrow
- Wide and round
- Slightly tilted
- Small and cute
- Large and realistic
Which shape do you like best? Experimenting helps you develop your own drawing style.
How To Make Your Apple Drawing More Realistic
You can create a more realistic apple by adding extra details after you finish the basic outline.
Start by studying how light affects the apple. One side usually appears brighter, while the opposite side appears darker.
You can add:
- A soft highlight
- Gentle shadows
- Subtle color changes
- A darker area near the stem
- A few tiny natural marks
The key to realistic apple drawing lies in subtle details. You don’t need to add every tiny mark you see on a real apple. A few carefully placed details can create a much stronger result.
Try using several shades of the same color instead of one flat color. For example, use bright red in the center, deeper red near the edges, and a lighter red near the highlight.
Easy Apple Drawing Ideas for Beginners
Once you learn the basic steps, you can use the same apple shape in lots of creative ways.
Try drawing:
- A sliced apple
- A basket filled with apples
- An apple sitting on a table
- A cartoon apple with a face
- A small apple tree
- A realistic red apple with shadows
- A green apple beside a red apple
You can also turn your apple drawing into a greeting card, classroom activity, coloring page, or simple wall art.
One basic drawing idea can lead to dozens of new projects. That’s one reason I enjoy simple subjects so much. You start with a few lines, then suddenly you have an entire collection of ideas.
Common Mistakes When Drawing an Apple
Even simple drawings can create a few challenges. Fortunately, you can fix most problems easily.
Making the Apple Too Perfect
A perfectly symmetrical apple can look stiff. Try adding small differences between the two sides.
Drawing the Stem Too Straight
A completely straight stem can make the apple look artificial. Add a slight curve for a more natural appearance.
Making the Leaf Too Large
A huge leaf can distract from the apple. Keep the leaf proportional to the fruit.
Adding Too Much Detail
More detail doesn’t always create a better drawing. Simple lines often create the cleanest and most appealing result, especially for beginner artwork.
Practice Makes Apple Drawing Easier
Your first apple might look slightly uneven. That’s completely normal.
Your second apple might look better. Your third might suddenly look fantastic. Then your fourth might decide to become a potato. That’s art for you.
The important thing involves continuing to practice. Every drawing helps you understand curves, proportions, spacing, and shape.
Try drawing the apple from different angles. Draw one apple from the front, another from the side, and another with a slight tilt.
You can also practice each part separately. Draw ten apple outlines, then ten stems, then ten leaves. This method helps your hand become more comfortable with the shapes.
Final Thoughts on How To Draw an Apple
Learning how to draw an apple doesn’t require complicated techniques. You can create a clear and attractive apple drawing by following seven simple steps: draw the first curve, complete the outline, add the top indentation, draw the stem, add the leaf, draw the leaf veins, and color your apple.
Start with simple shapes, use light sketch lines, and give yourself room to make mistakes. Your goal doesn’t involve creating a perfect apple on your first try. Your goal involves learning how the shape works and enjoying the process.
So grab your pencil, draw that first curve, and see where it takes you. Who knows? Your next simple apple might become the beginning of an entire fruit-themed sketchbook. 🍎