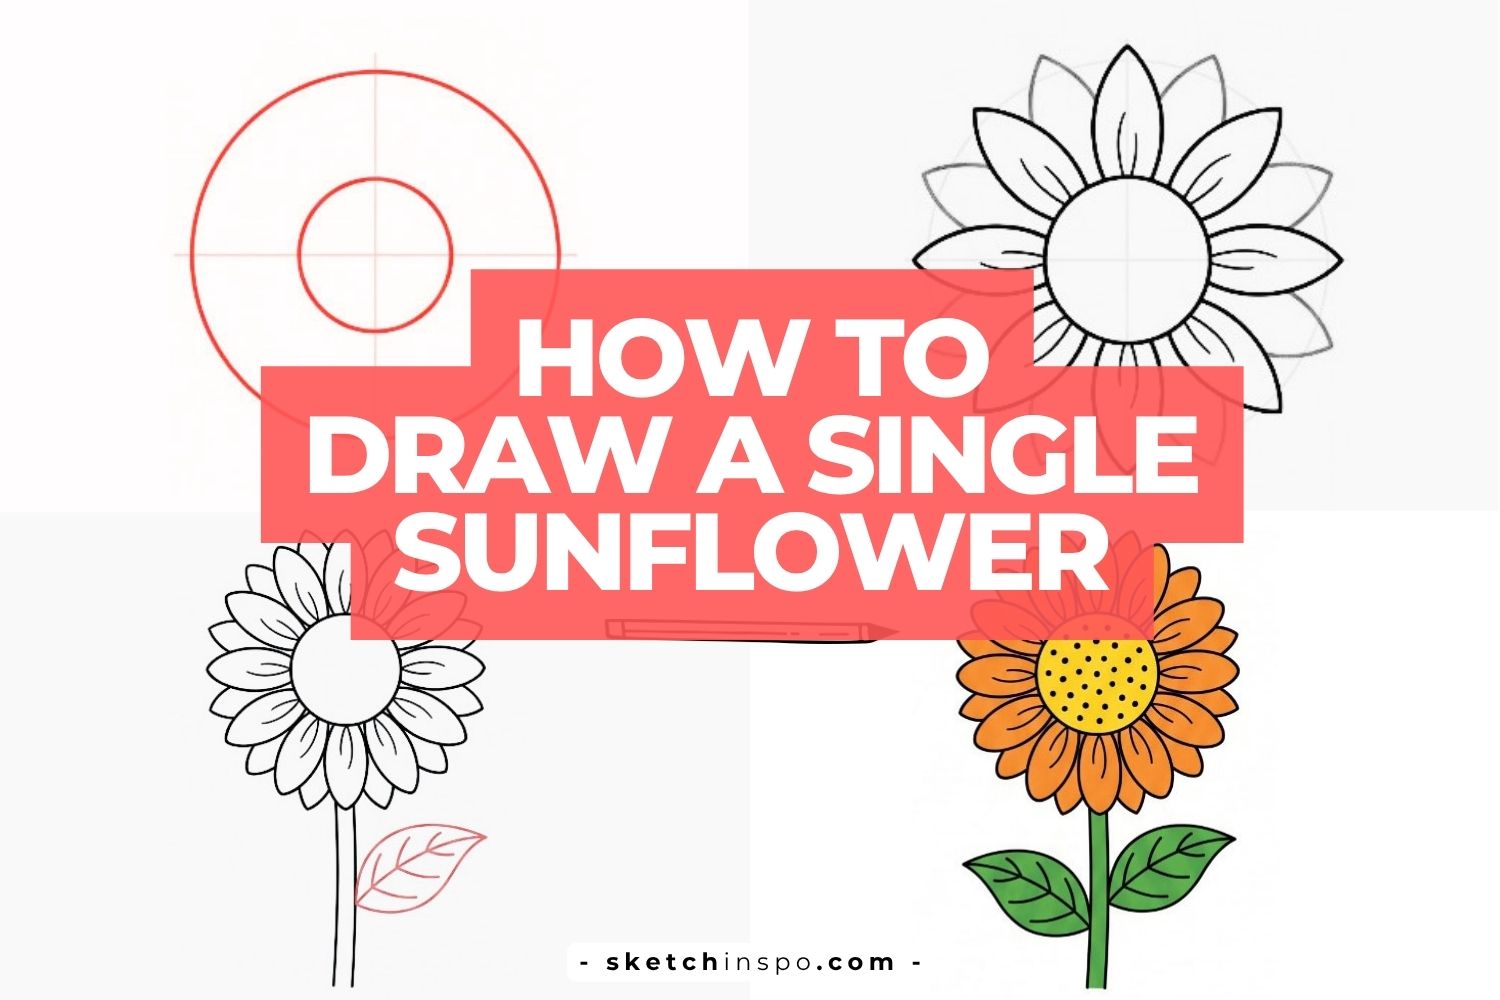
How To Draw a Single Sunflower
Few flowers steal the spotlight quite like a sunflower. With its bright petals, cheerful appearance, and simple structure, it’s one of the most rewarding flowers to draw. The best part? You don’t need years of artistic experience to create one.
I still remember sketching my first sunflower. It looked more like a confused daisy that had a rough morning :), but the process taught me something important: simple shapes can create beautiful drawings.
If you’ve been searching for how to draw a single sunflower, this step-by-step guide will walk you through the entire process. Grab your pencil, a sheet of paper, and let’s create a sunflower that actually looks like a sunflower.
Why Draw a Sunflower?
Before we start, let’s talk about why sunflowers make such great drawing subjects.
A sunflower offers the perfect balance between simplicity and detail. You can practice drawing circles, petals, leaves, and shading without feeling overwhelmed.
Here are a few reasons artists love drawing sunflowers:
- Easy basic shapes
- Great for beginners
- Perfect for coloring practice
- Excellent for learning flower anatomy
- Fun to customize with different styles
Ever notice how some flowers seem complicated from the start? Sunflowers don’t play that game. They welcome beginners with open petals.
Supplies You’ll Need
You don’t need expensive art supplies for this tutorial.
Gather these basic materials:
- Pencil
- Eraser
- Black pen or marker
- Drawing paper
- Colored pencils, markers, or crayons
Simple tools often produce the best beginner drawings. Fancy supplies can’t save bad proportions, but good practice can.
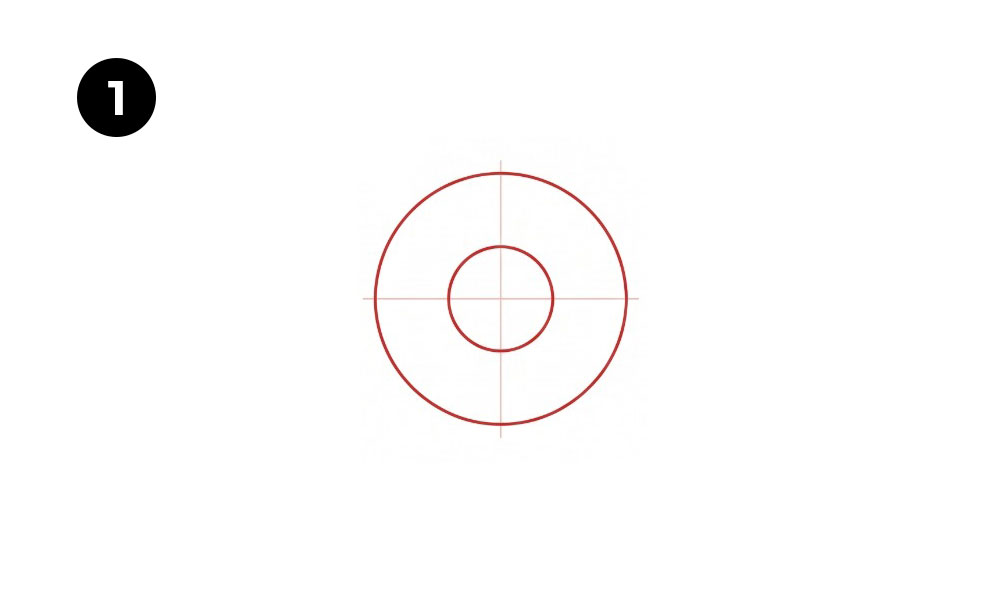
Step 1. Draw the Flower Center Guidelines
Every sunflower starts with its center.
Begin by drawing a large circle. Then draw a smaller circle inside it. These circles create the framework for the flower head.
Next, add a vertical guideline and a horizontal guideline through both circles. These lines help you place the petals evenly.
Why This Step Matters
Many beginners skip guidelines because they seem unnecessary.
Then the petals start drifting around the flower like they’re searching for parking spaces.
Guidelines create balance and symmetry. They give you clear reference points for every petal you’ll draw later.
Keep your lines light because you’ll erase them later.
Step 2. Sketch the First Layer of Petals
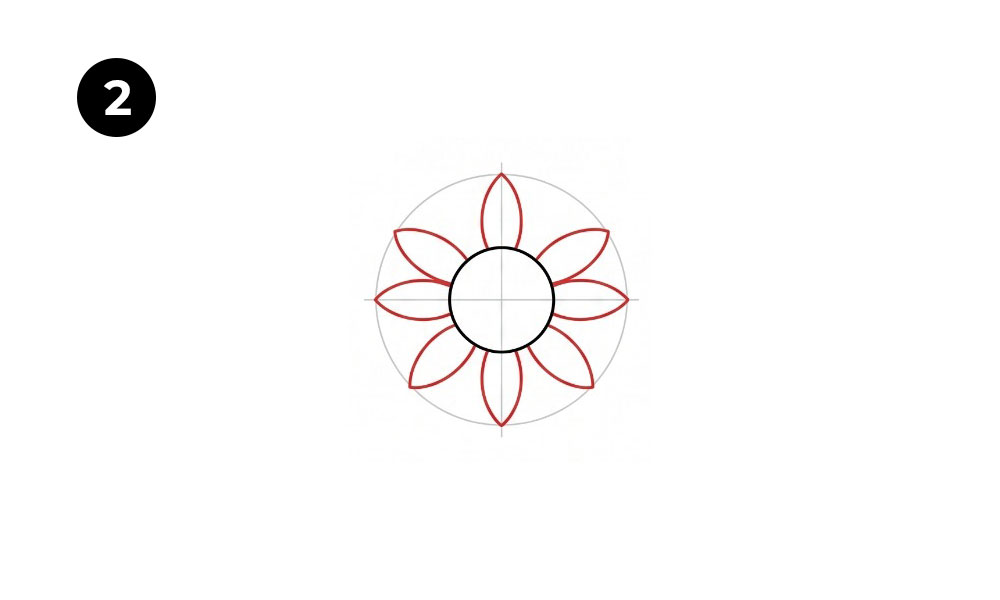
Now comes the fun part.
Draw several large petals around the outer circle. Space them evenly around the flower center.
Each petal should have:
- A rounded base
- Slightly curved sides
- A pointed tip
Try drawing eight petals first. Use the guidelines to keep everything aligned.
Tips for Better Petals
Don’t worry about making every petal identical.
Real sunflowers don’t grow with mathematical precision. Slight variations actually make the flower look more natural.
Focus on consistent size rather than perfect duplication.
Ever looked at a real sunflower and counted perfectly identical petals? Neither have I.
Step 3. Add the Second Layer of Petals
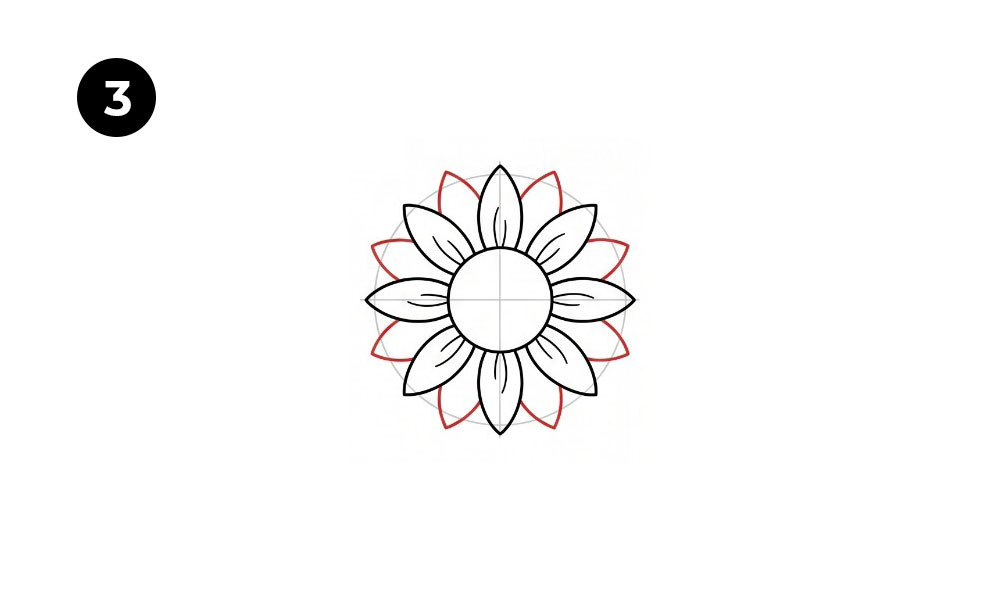
A sunflower looks fuller when you add another row of petals.
Draw additional petals between the spaces of the first layer. Position these petals slightly behind the original row.
This overlapping effect adds depth and realism.
Creating Natural Layers
When drawing the second layer:
- Start between existing petals.
- Make them slightly smaller.
- Let portions disappear behind the front petals.
- Keep the spacing consistent.
Layering transforms a flat flower into a dimensional drawing.
This step often makes artists pause and think, “Okay, now it actually looks like a sunflower.”
Step 4. Draw the Sunflower Stem
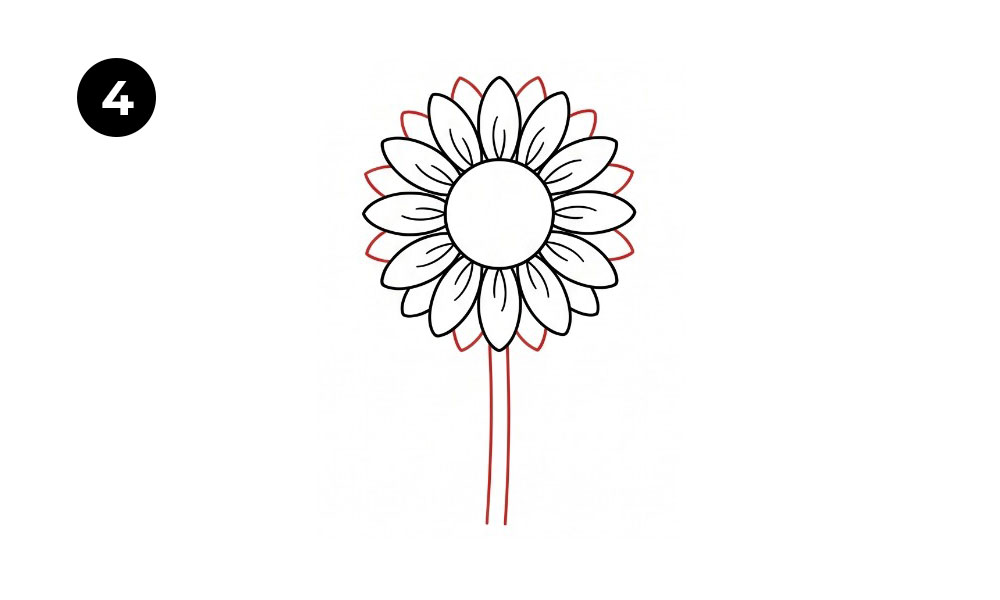
At this stage, your sunflower head should look complete.
Now draw two slightly curved vertical lines extending downward from the flower center. These lines form the sunflower’s stem. Keep the stem sturdy and proportional to the size of the flower.
Making the Stem Look Natural
Sunflower stems tend to be thick and strong.
Avoid drawing the stem too thin because the large flower head needs proper support. A thicker stem creates a more realistic sunflower drawing.
Take a moment to check the stem’s length and position before moving on.
Step 5. Add the First Leaf
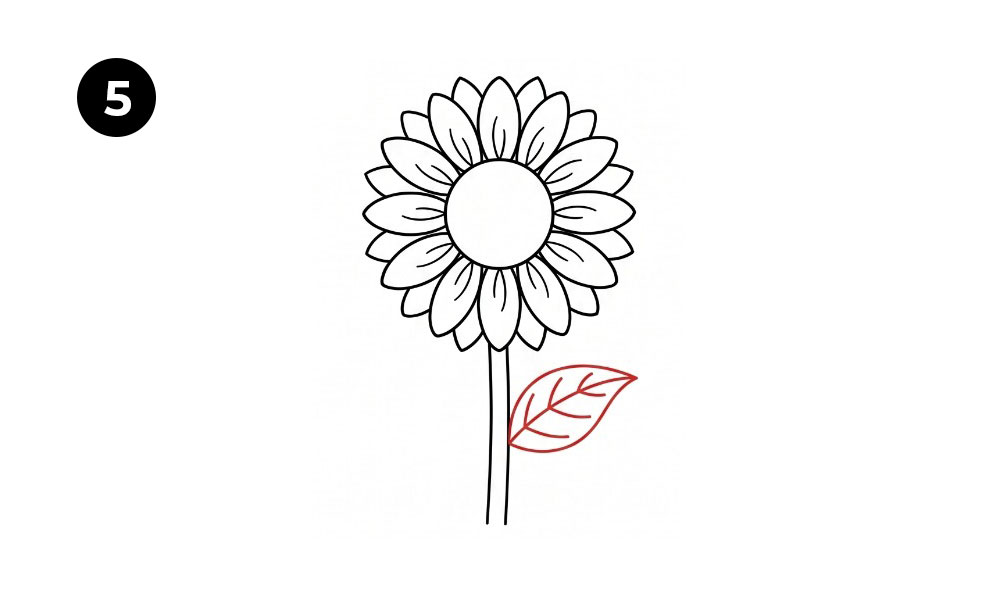
Now let’s give your sunflower some character.
Draw a leaf on one side of the stem using a pointed oval or almond-like shape. Position it slightly below the flower head for a balanced appearance.
Creating a Natural Leaf Shape
Keep these tips in mind:
- Draw a pointed tip.
- Use gentle curves for the leaf edges.
- Add a central vein running through the middle.
- Keep the leaf size proportional to the stem.
A well-placed leaf makes the sunflower look more complete and realistic.
Once you’re happy with the shape, you can prepare for the next step where you’ll add the second leaf and extra details.
Step 6. Add the Second Leaf and Details
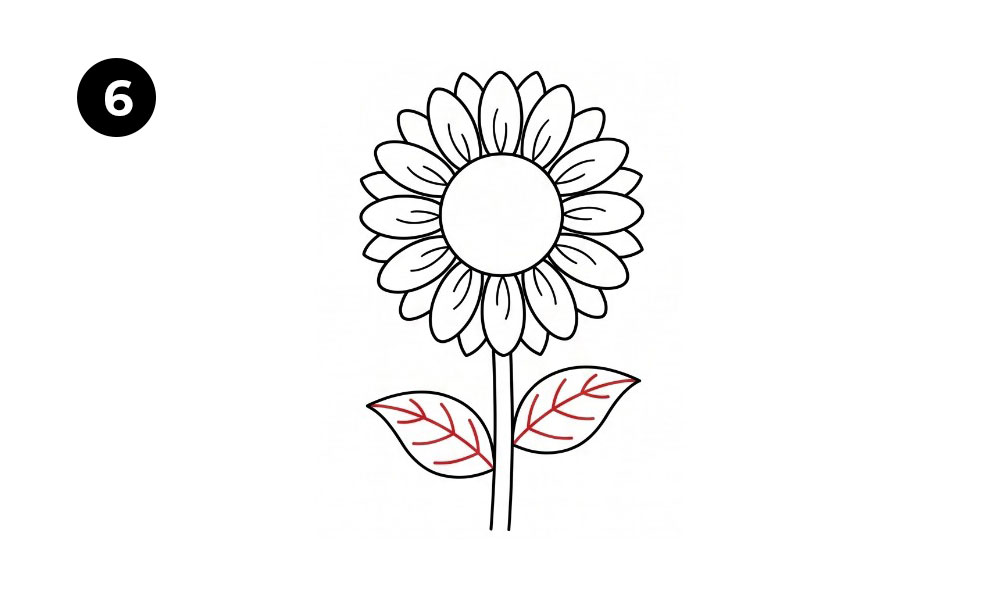
Now balance the composition by adding another leaf on the opposite side.
Draw a similar shape but change the angle slightly. This variation creates a more natural appearance.
After drawing the leaf, add smaller branching veins.
Details That Enhance the Drawing
Focus on these finishing details:
- Leaf veins
- Petal vein lines
- Cleaner outlines
- Balanced proportions
Many beginners rush through details because they want to start coloring immediately.
Trust me, spending an extra few minutes here makes a huge difference.
Details give personality to the sunflower.
IMO, this stage separates a basic sketch from a polished drawing.
Step 7. Color the Sunflower Drawing
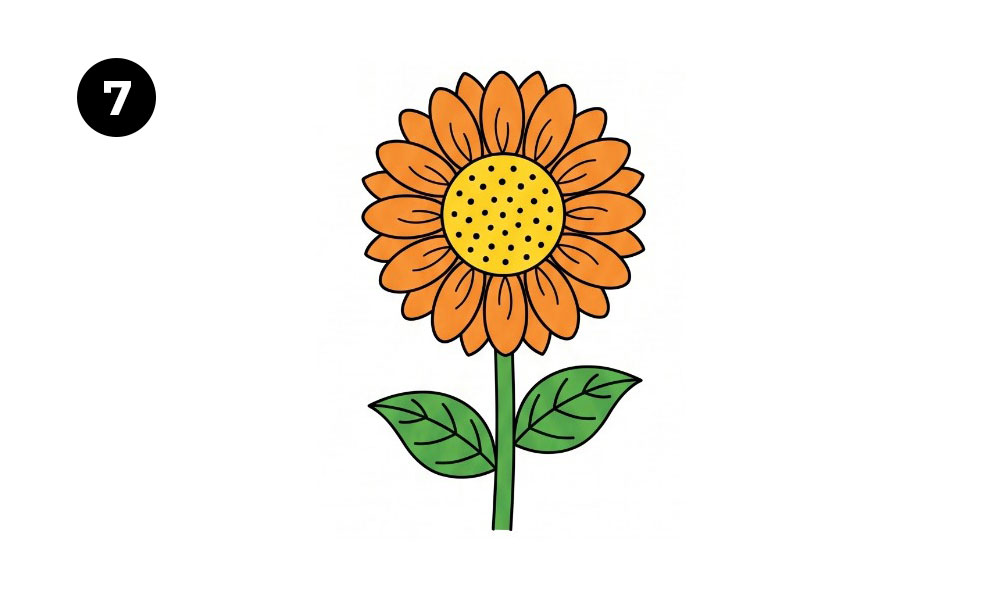
Now your sunflower is ready for color.
Traditional sunflowers feature bright yellow or orange-yellow petals, a dark center, and green leaves.
Color each section carefully.
Use:
- Yellow or orange for petals
- Brown or golden yellow for the center
- Green for leaves
- Dark green for stem details
Adding Depth with Color
You can make your sunflower look more realistic by using multiple shades.
Try these combinations:
| Area | Base Color | Shadow Color |
|---|---|---|
| Petals | Yellow | Orange |
| Center | Golden Yellow | Brown |
| Leaves | Light Green | Dark Green |
| Stem | Green | Dark Green |
Layering colors creates depth and visual interest.
Even simple color blending can dramatically improve the final result.
Don’t Forget the Seed Pattern
A sunflower center contains hundreds of seeds.
Add small dots throughout the center area to represent these seeds.
This tiny detail instantly makes the drawing recognizable.
Ever wonder why sunflower centers look so interesting? Those seed patterns create a natural texture that catches the eye.
Common Mistakes Beginners Make
Let’s save you from a few classic sunflower-drawing headaches.
Uneven Petal Placement
Many artists cluster petals on one side.
Use guidelines to distribute petals evenly around the center.
Oversized Flower Center
A huge center can make the flower look disproportionate.
Keep the center balanced with the overall petal arrangement.
Tiny Leaves
Large flower, tiny leaves.
The result often looks odd. Match leaf size to the flower’s scale.
Rushing the Details
Details may seem boring, but they dramatically improve the finished drawing.
Patience creates better artwork.
No one hangs a masterpiece on the wall because they rushed through it.
How to Make Your Sunflower More Realistic
Once you master the basic version, you can experiment with advanced techniques.
Try adding:
- Curved petals
- Extra petal layers
- Soft shading
- Textured centers
- Background elements
These additions increase realism without making the process overly complicated.
Practice Observation
One of the best ways to improve your sunflower drawings involves studying real flowers.
Look at reference photos and notice:
- Petal direction
- Leaf shape
- Stem thickness
- Seed placement
Observation improves artistic accuracy faster than endless repetition.
The more you study real sunflowers, the easier drawing them becomes.
Benefits of Drawing Flowers
Drawing flowers isn’t just fun.
It also helps you develop valuable artistic skills.
You practice:
- Shape recognition
- Line control
- Symmetry
- Composition
- Color application
Many professional artists start with flowers because they offer excellent training opportunities.
A sunflower gives you plenty of practice without overwhelming complexity.
Final Thoughts on How To Draw a Single Sunflower
Learning how to draw a single sunflower doesn’t require advanced skills or expensive supplies. You simply need a few basic shapes, some patience, and a willingness to embrace a few imperfect petals along the way.
Start by drawing the flower center guidelines, then build your petals layer by layer. Add the stem, leaves, and details before finishing with bright colors. Each step builds naturally on the previous one, making the process approachable for beginners.
Most importantly, enjoy the experience. Every artist creates awkward first attempts. Mine certainly qualified. But each sunflower teaches something new, and every sketch brings you closer to the result you want.
So grab that pencil, draw another sunflower, and see how much better the next one looks. You might surprise yourself.