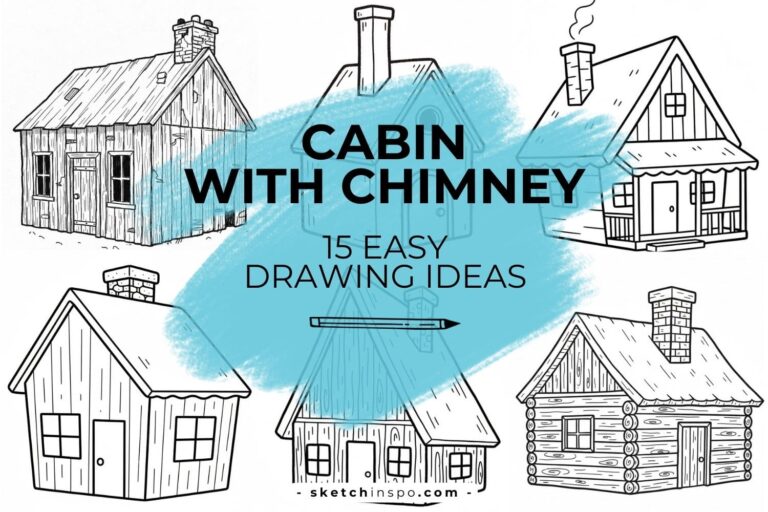
How To Draw a Cabin with Chimney
Nothing feels quite as cozy as a little cabin with a chimney. Just picture it for a second: a warm house tucked away in the woods, smoke curling from the chimney, and a peaceful afternoon waiting inside. Sounds nice, right?
The good news is that you don’t need advanced drawing skills to create one. If you can draw a few simple shapes, you can learn how to draw a cabin with chimney in just a few easy steps. I actually love drawing cabins because they combine basic geometry with charming details. Plus, they look impressive even when you keep the design simple.
Grab your pencil, paper, and eraser, and let’s start building a cozy cabin from the ground up.
Why Draw a Cabin with a Chimney?
Cabins make fantastic drawing subjects because they balance simplicity and character. You don’t need complicated perspectives or advanced techniques to make them look great.
A cabin drawing also helps you practice:
- Straight lines
- Basic shapes
- Symmetry
- Simple architectural details
- Coloring techniques
And honestly, who can resist adding a cute little chimney? A cabin without a chimney sometimes feels like a sandwich without filling. Technically it works, but something feels missing. 🙂
Materials You’ll Need
Before you start, gather a few simple supplies.
- Pencil
- Eraser
- Drawing paper
- Black pen or marker (optional)
- Colored pencils or crayons
You don’t need expensive art supplies. IMO, a regular school pencil works perfectly for this project.
Step 1. Draw the House Base
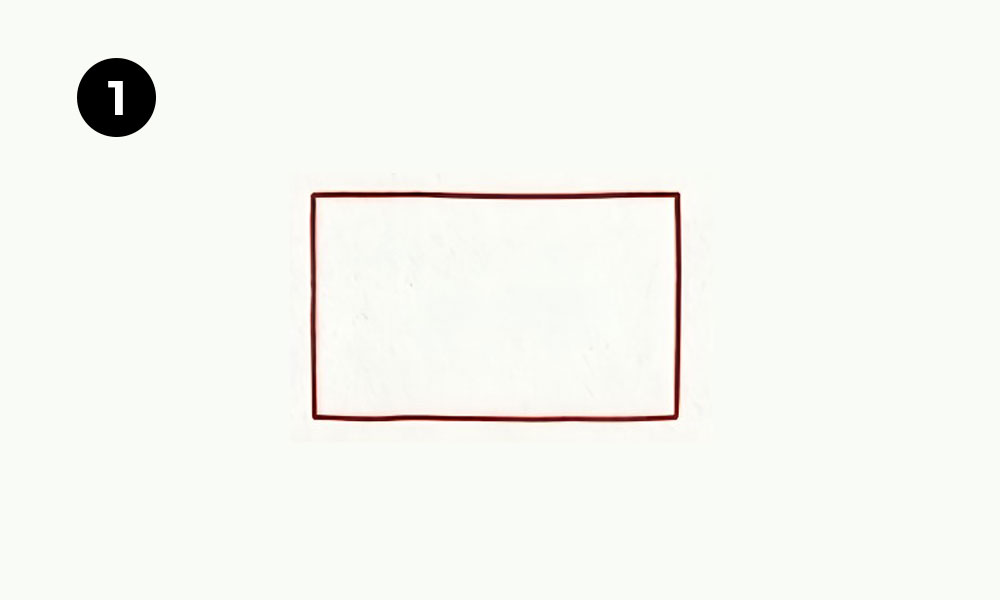
Every cabin needs a strong foundation, so let’s begin with the main structure.
Draw a large rectangle near the center of your page. This rectangle forms the body of the cabin and provides space for all the details you’ll add later.
Why Start with a Rectangle?
The rectangle acts as a guide for the entire drawing. When you establish the cabin’s size early, you avoid squeezing windows into tiny spaces later.
Keep these tips in mind:
- Draw lightly at first.
- Leave room above for the roof.
- Keep the sides reasonably straight.
- Make the rectangle wider than it is tall.
Don’t worry about perfection. Even real cabins rarely look perfectly symmetrical.
Step 2. Add the Roof
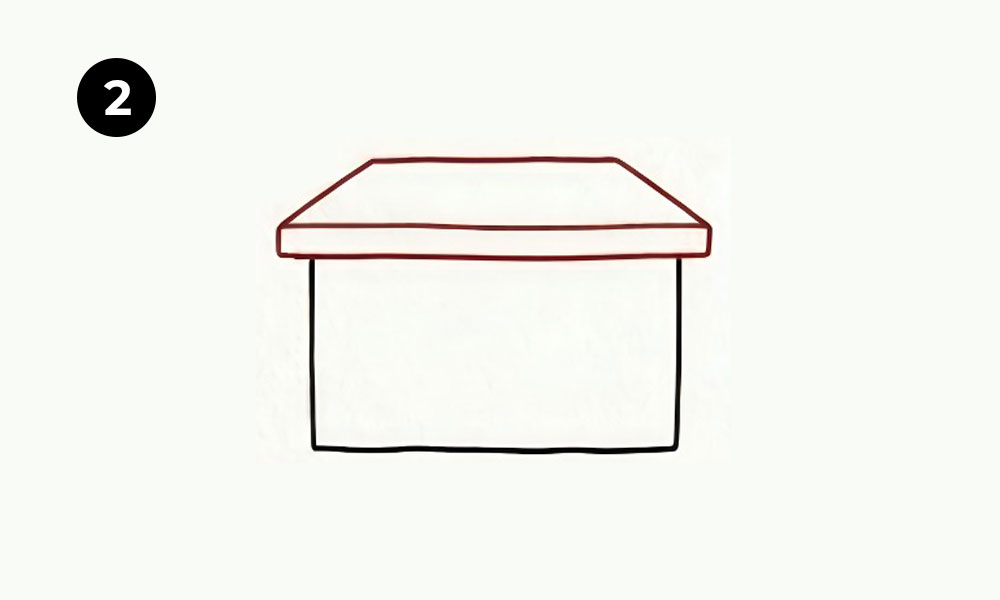
Now comes one of the most recognizable parts of the cabin.
Draw a large roof sitting on top of the rectangle. Create a trapezoid-like shape with slightly angled sides. Then add a second line underneath the roof edge to give it thickness.
Suddenly your rectangle starts looking like a real house.
Making the Roof Look Better
Want a more realistic cabin?
Try these simple tricks:
- Extend the roof beyond the cabin walls.
- Keep both roof sides balanced.
- Draw smooth connecting lines.
- Leave space for the chimney.
Ever notice how a roof changes the personality of a house? A wider roof instantly makes the cabin feel cozier and more welcoming.
Step 3. Draw the Chimney
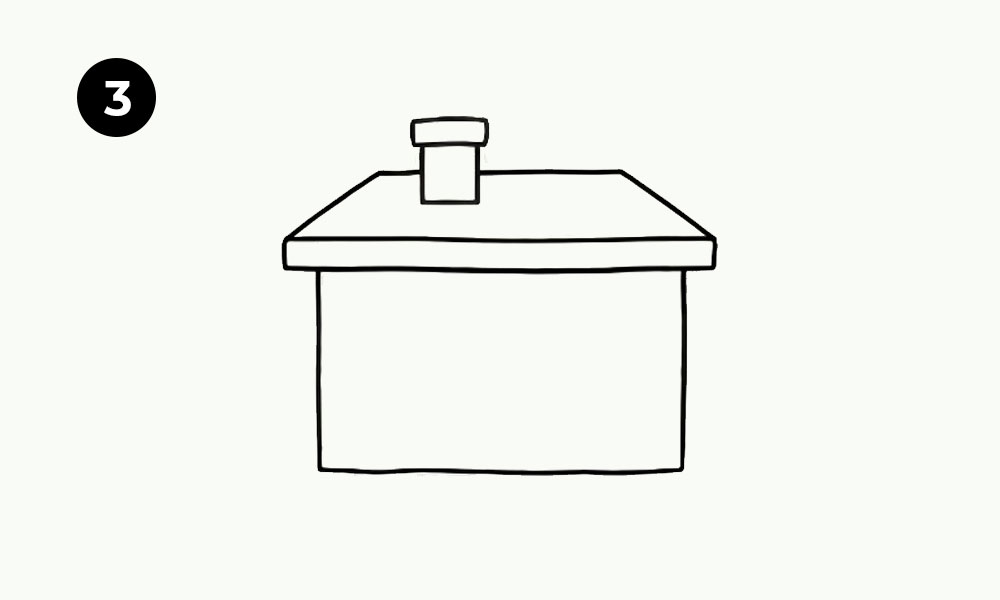
Now let’s add the star of the show.
Draw a narrow rectangle extending upward from the roof. Then add a smaller horizontal rectangle on top to create the chimney cap.
This simple detail transforms an ordinary house into a cozy cabin.
Why Chimneys Add Character
A chimney tells a story.
When people see one, they imagine:
- Warm fireplaces
- Winter evenings
- Mountain retreats
- Hot chocolate by the fire
Okay, maybe not everyone immediately thinks about hot chocolate, but I definitely do.
Keep the chimney slightly off-center for a natural appearance.
Step 4. Add the Door and Windows
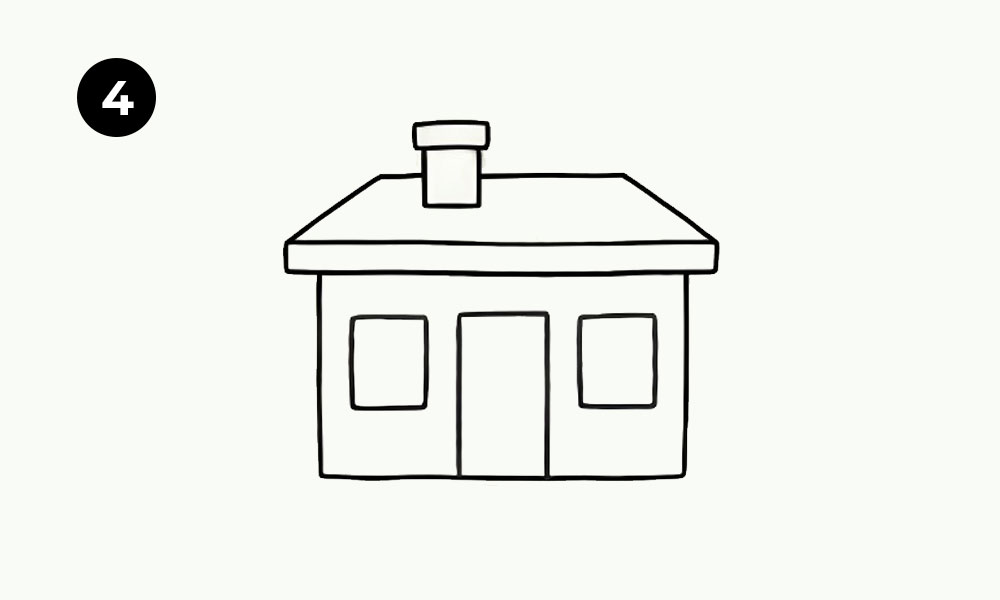
The cabin structure is complete, so now it’s time to make it livable.
Draw a tall rectangle in the center for the door. Then add one square or rectangular window on each side of the door.
These features bring balance to the design and make the cabin feel welcoming.
Placement Tips
For a clean layout:
- Center the door.
- Position windows at equal heights.
- Leave equal spacing between elements.
- Keep the windows proportional.
Ask yourself this: would you want to live in a cabin with windows the size of postage stamps? Probably not.
A little symmetry goes a long way here.
Step 5. Draw the Window Frames
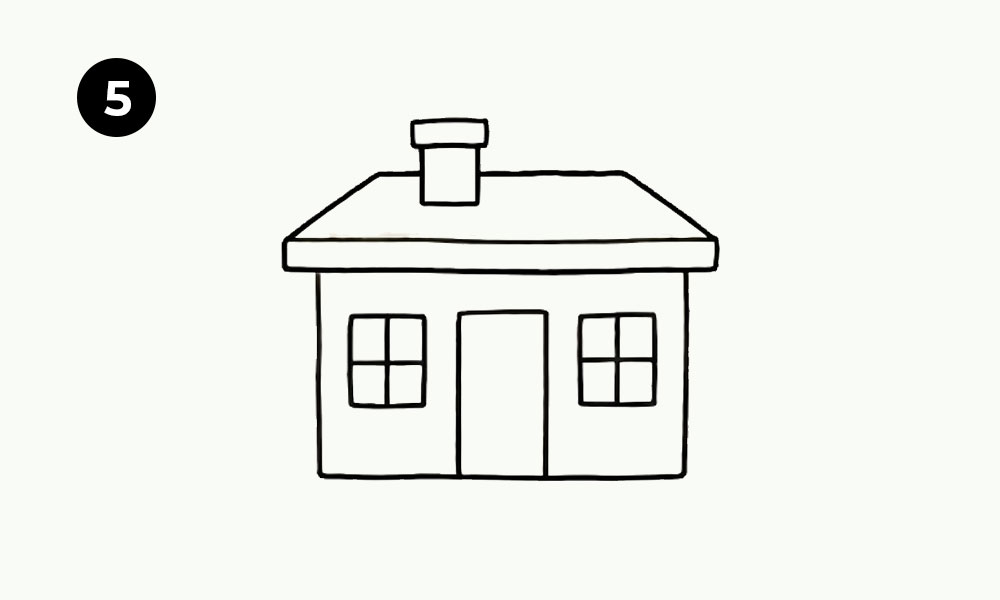
Right now your windows probably look like empty boxes.
Let’s fix that.
Draw one vertical line and one horizontal line inside each window. These lines create four window panes.
This small detail adds a surprising amount of realism.
Why Window Frames Matter
Many beginner artists skip window details. I used to do the same thing.
Adding window frames helps:
- Create depth
- Improve realism
- Add visual interest
- Make the cabin look complete
Sometimes the smallest details make the biggest difference.
Step 6. Add Door Details
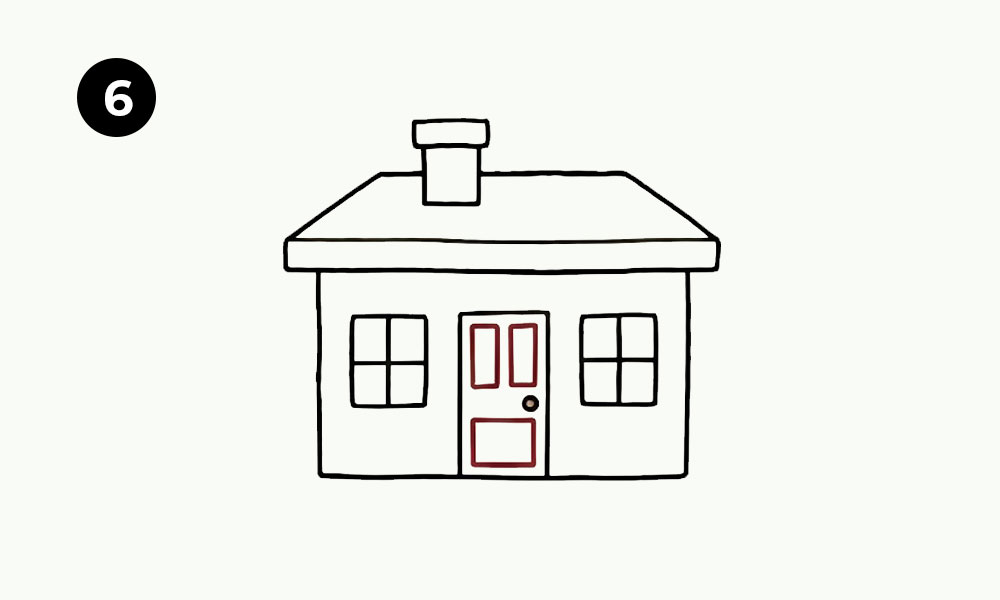
Your door deserves some personality too.
Draw smaller rectangular panels inside the door. Then add a tiny circle on one side for the doorknob.
These details instantly upgrade the drawing.
Easy Door Design Ideas
You can customize your door in several ways:
- Single panel design
- Double panel design
- Rounded window insert
- Decorative trim
For this cabin drawing, simple rectangular panels work perfectly.
FYI, simple designs often look cleaner than overly complicated ones.
Step 7. Color the House
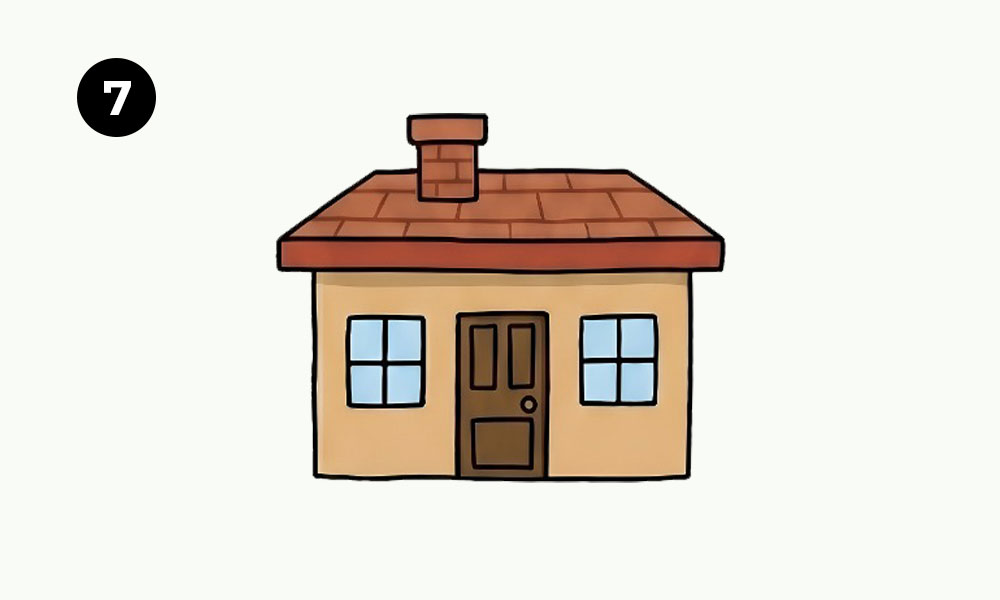
Now comes the fun part.
Use colors to bring your cabin to life.
You can follow a traditional cabin color scheme or create something unique.
Suggested Color Palette
Try these color combinations:
Walls
- Light tan
- Beige
- Warm yellow
Roof
- Brown
- Red-brown
- Dark orange
Door
- Dark brown
- Walnut
- Chocolate brown
Windows
- Light blue
- Sky blue
Chimney
- Brick red
- Brown-red
Adding Extra Depth
Want your drawing to stand out even more?
Add:
- Light shading under the roof
- Slight shadows beside the chimney
- Darker edges around the door
- Gentle color variations
You don’t need advanced shading techniques. A little contrast creates a huge improvement.
Common Mistakes to Avoid
Even simple cabin drawings can run into a few problems.
Making the Roof Too Small
A tiny roof can make the cabin look awkward.
Extend the roof slightly beyond the walls for a balanced appearance.
Forgetting Proportions
Large windows and a tiny door often create strange-looking houses.
Compare each element as you draw.
Pressing Too Hard
Many beginners press hard during sketching.
Draw lightly first so you can erase mistakes easily.
Trust me, your eraser will thank you.
Fun Ways to Customize Your Cabin
Once you finish the basic cabin, why stop there?
You can personalize your artwork with extra details.
Add Nature Elements
Draw:
- Pine trees
- Bushes
- Flowers
- Mountains
- Grass
These additions create a complete outdoor scene.
Add Seasonal Features
Want a winter cabin?
Add:
- Snow on the roof
- Snowflakes
- Icicles
- Smoke from the chimney
Prefer summer?
Draw green trees and bright flowers around the cabin.
Create a Story
Every drawing becomes more interesting when it tells a story.
Ask yourself:
- Who lives in the cabin?
- Is it hidden in the forest?
- Does someone visit during winter vacations?
- Is there a friendly dog nearby?
These little ideas can inspire future drawings.
Benefits of Drawing Simple Cabins
Learning how to draw a cabin with chimney offers more than just a finished picture.
You also practice:
- Observation skills
- Hand-eye coordination
- Shape recognition
- Creative thinking
- Artistic confidence
Every drawing teaches something new.
The best part? You don’t need perfection to improve. You just need practice.
Final Thoughts
Learning how to draw a cabin with chimney is a fun and beginner-friendly project that anyone can enjoy. By starting with the house base, adding the roof, drawing the chimney, and finishing with details and color, you can create a charming cabin step by step.
Remember, every artist starts with simple shapes. Some drawings turn out amazing, and some look like they survived a windstorm. That’s part of the process.
Keep practicing, experiment with your own creative touches, and most importantly, have fun. Before long, you’ll have an entire collection of cozy cabins ready to decorate your sketchbook.