How To Draw a T-Shirt on a Wooden Hanger
Ever looked at a simple T-shirt hanging on a wooden hanger and thought, “That should be easy to draw”? Then you grabbed a pencil, sketched a few lines, and somehow ended up with something that looked more like a melted pillow than a shirt. Yep, we’ve all been there.
The good news is that drawing a T-shirt on a wooden hanger becomes surprisingly easy when you break it into simple steps.
I use this approach whenever I want a clean clothing sketch because it keeps the proportions balanced and prevents those awkward-looking sleeves that seem to have a life of their own. Let’s grab a pencil and start drawing!
What You’ll Need Before You Start
You don’t need an expensive art setup. In fact, simple supplies work perfectly.
Here’s what I recommend:
- HB pencil for sketching
- 2B or 4B pencil for shading
- Good eraser
- Drawing paper or sketchbook
- Colored pencils or markers (optional)
- Black fineliner for clean outlines (optional)
FYI, don’t worry if your first sketch isn’t perfect. Every great drawing begins with light, messy guidelines.
Why Draw the Hanger First?
Many beginners start with the shirt. I actually prefer drawing the hanger first because the hanger naturally sets the shirt’s proportions.
Think about it for a second. The hanger controls:
- Shoulder width
- Neck placement
- Overall symmetry
- Hanging position
Without that framework, the shirt can quickly lean to one side or stretch into some strange fashion experiment nobody asked for.
Step 1: Draw the Hanger & Shoulder Outline
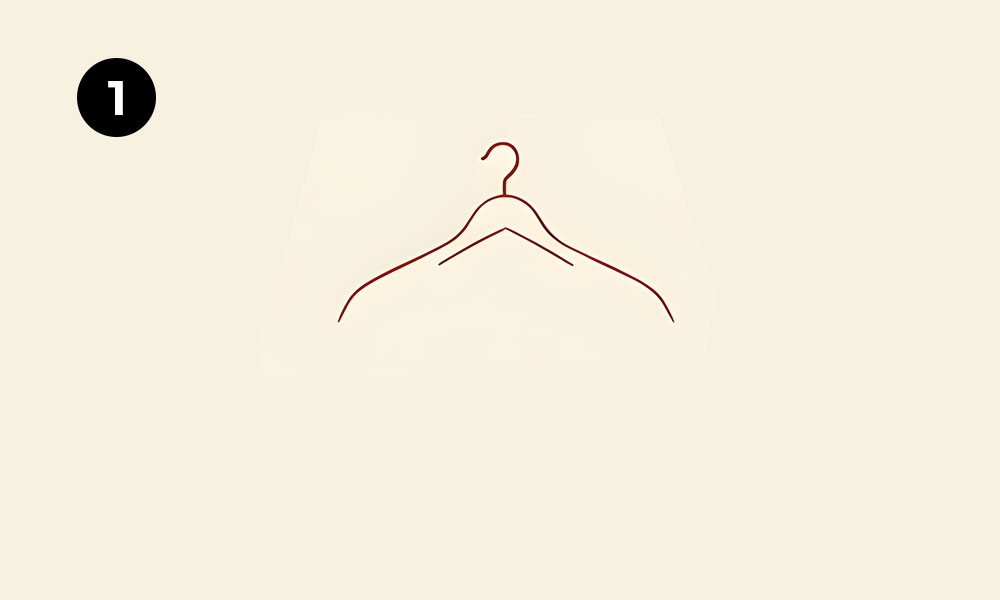
Everything begins here.
Start by sketching a simple wooden hanger with a smooth triangular shape. Then draw the curved metal hook on top.
Next, extend gentle curved lines from each side of the hanger. These become the shoulders of the T-shirt.
Tips for Better Results
- Draw with light pencil pressure.
- Keep both shoulders symmetrical.
- Let the shoulders slope naturally.
- Avoid making sharp corners.
A relaxed curve instantly makes the shirt look more realistic.
Step 2: Add the Crew Neck Collar
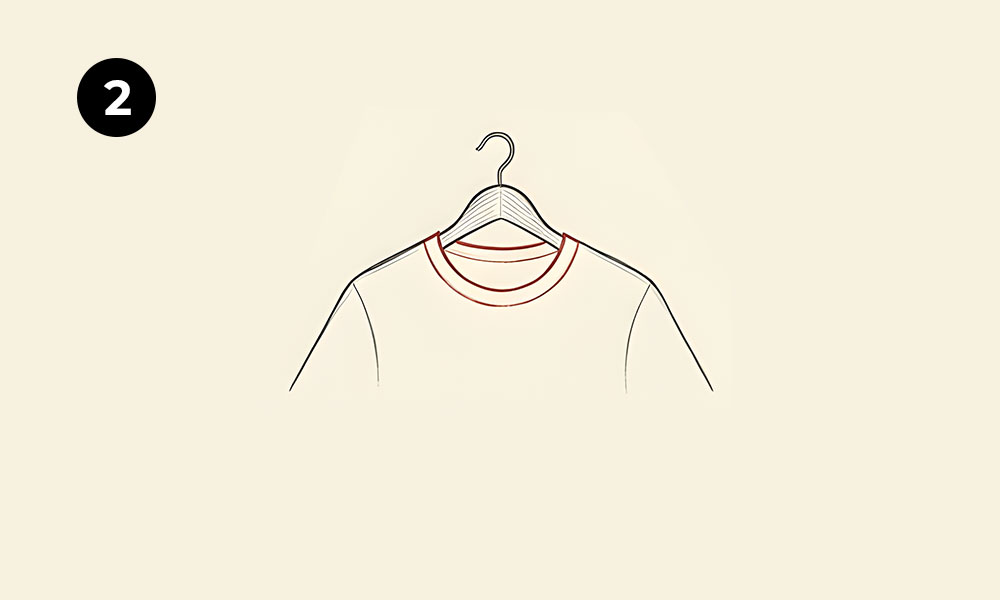
Now it’s time to define the neckline.
Draw a slightly curved oval beneath the hanger hook to create the crew neck collar. Then add a second inner line to show the ribbed collar.
This tiny detail makes a surprisingly huge difference.
Why the Double Line Matters
Real T-shirts have fabric thickness.
Adding that second collar line gives your drawing:
- More realism
- Better depth
- Cleaner construction
Ever notice how professional clothing sketches always include little construction details? That’s one reason they look so polished.
Step 3: Sketch the Short Sleeves
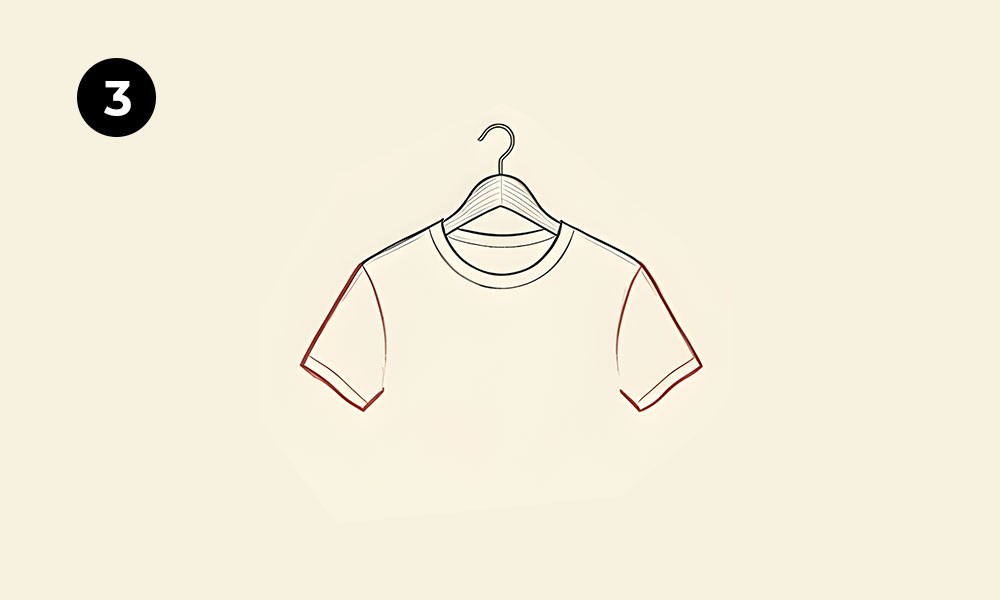
The sleeves give your shirt personality.
Draw angled lines extending from each shoulder, then connect them with slightly curved sleeve openings.
Keep both sleeves roughly equal in size, but don’t obsess over perfection.
Honestly, perfectly identical sleeves can look a little robotic. Clothing naturally shifts while hanging.
Common Sleeve Mistakes
Avoid these beginner habits:
- Making sleeves too long
- Drawing sleeves perfectly flat
- Forgetting slight fabric curves
- Creating overly sharp angles
Instead, think about soft fabric hanging naturally.
Step 4: Draw the T-Shirt Body
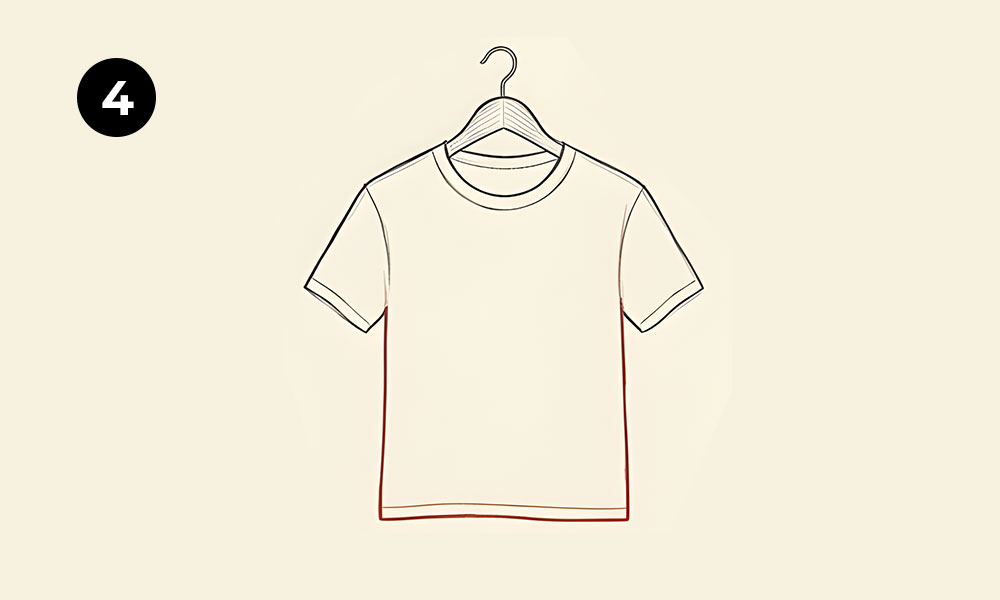
Now connect everything together.
Draw two mostly straight vertical lines downward from the sleeves to create the sides of the shirt.
Then connect both sides with a gently curved bottom hem.
Keep the Shape Natural
Remember that gravity affects clothing.
Instead of creating a stiff rectangle, let the sides taper just a tiny bit toward the bottom.
Small curves make fabric feel alive.
Whenever I rush this step, my shirts somehow resemble cardboard boxes. Not exactly runway fashion.
Step 5: Add Fabric Folds & Collar Details
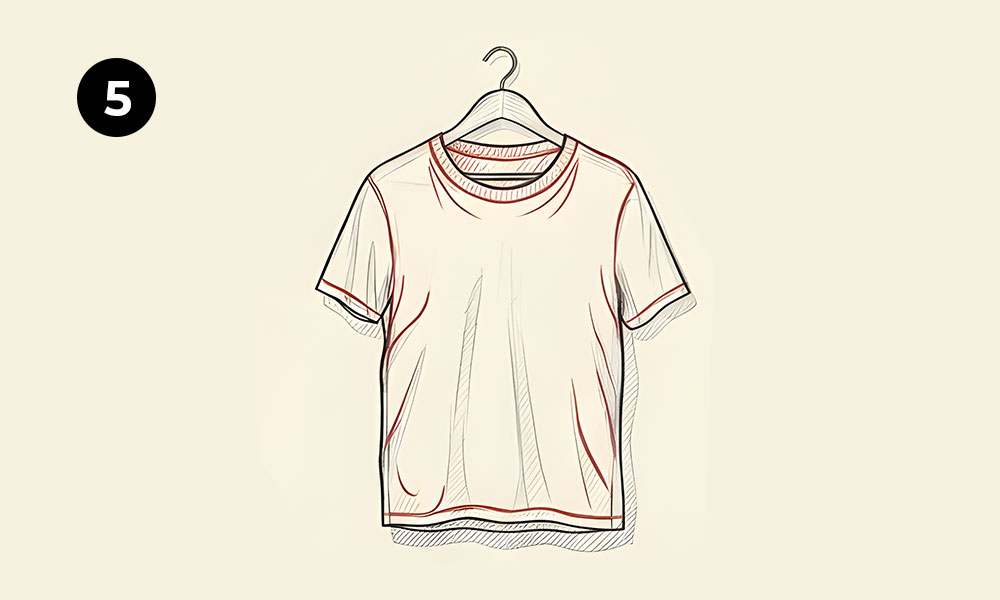
Here’s where the sketch starts looking like actual clothing.
Add gentle wrinkle lines around:
- The shoulders
- Under each sleeve
- The lower front
- Around the collar
Less really is more here.
Many beginners add wrinkles everywhere. Suddenly the poor T-shirt looks like someone stuffed it into a backpack for three weeks.
Drawing Natural Wrinkles
Think about where fabric naturally pulls.
Good wrinkle placement includes:
- Short curved folds beneath the sleeves
- Vertical folds near the center
- Soft creases around the neckline
- Slight bunching near the bottom hem
Keep your lines light and varied.
Step 6: Shade with Cross-Hatching
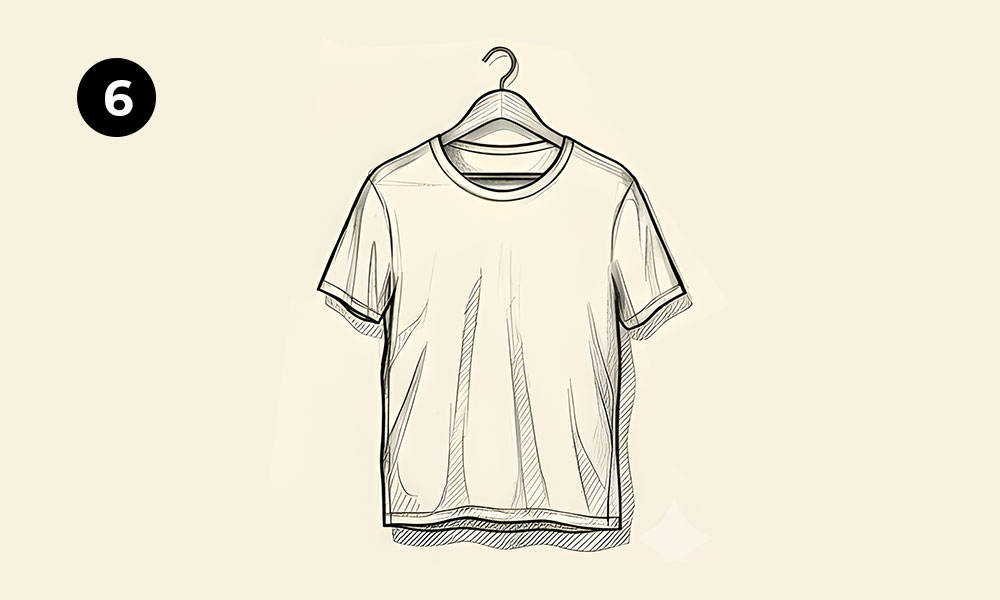
This step transforms a flat drawing into something with real depth.
Use cross-hatching by drawing overlapping sets of parallel lines.
Focus your darker shading around:
- Under the sleeves
- Beneath the collar
- Side seams
- Bottom hem
- Under the hanger
Build Shadows Gradually
Don’t press hard immediately.
Instead:
- Add one layer of hatching.
- Cross it with another direction.
- Darken only the deepest shadows.
- Blend lightly if desired.
Layering always beats heavy pressure.
Ever wondered why realistic sketches look so dimensional? It’s usually because the artist builds shadows patiently instead of trying to create darkness all at once.
Step 7: Color & Add Final Highlights
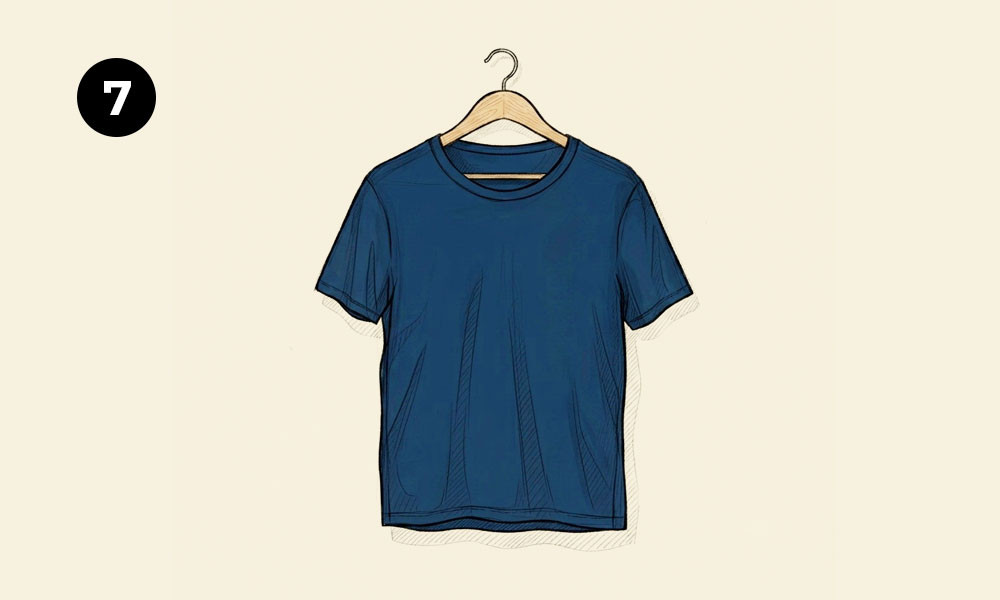
Now comes my favorite part.
If you’re using colored pencils or markers, apply light base colors first.
After that, deepen shadows with slightly darker tones.
Finally, leave tiny areas untouched to create highlights.
Great Color Choices
A plain white T-shirt works well, but don’t stop there.
Try colors like:
- Navy blue
- Forest green
- Burgundy
- Light gray
- Sky blue
- Black
For the wooden hanger, warm browns usually look the most realistic.
Don’t Forget the Hanger
Many artists spend all their time perfecting the shirt and then rush the hanger.
Give the wood subtle grain lines and warm shading.
A nicely rendered hanger frames the entire drawing beautifully.
Extra Tips to Make Your Drawing Look Better
Small improvements often create the biggest visual difference.
Here are a few tricks I always keep in mind.
Use Reference Photos
Professional artists constantly use references.
Looking at a real hanging T-shirt helps you understand:
- Fabric weight
- Wrinkle placement
- Sleeve angles
- Shadow direction
Using references doesn’t count as cheating. It counts as learning.
Keep Construction Lines Light
Sketch lightly during the early stages.
That way you can erase mistakes without damaging the paper.
Heavy guidelines often stay visible, even after erasing.
Rotate Your Paper
This sounds almost too simple.
Sometimes rotating your sketchbook makes difficult curves much easier to draw.
IMO, this tiny habit improved my line quality more than buying fancy pencils ever did.
Common Mistakes Beginners Make
Everyone makes mistakes while learning.
Here are the ones I see most often.
Drawing the Neck Too Large
The collar should fit naturally beneath the hanger.
Oversized neck openings make the shirt look stretched.
Ignoring Gravity
Fabric hangs downward.
Wrinkles and folds should follow gravity rather than random directions.
Making Everything Symmetrical
Perfect symmetry often looks unnatural.
Tiny differences actually make clothing feel more realistic.
Using Heavy Outlines Everywhere
Not every edge needs a dark outline.
Allow some edges to stay lighter, especially where light hits the shirt.
This simple trick adds depth instantly.
Practice Exercises
Want faster improvement?
Try drawing the same T-shirt several different ways.
For example:
- Draw a plain white shirt.
- Draw a striped shirt.
- Draw a graphic tee.
- Draw an oversized T-shirt.
- Draw a wrinkled vintage shirt.
Each version teaches something different about folds, shading, and proportion.
You’ll improve much faster than drawing one complicated illustration every weekend.
How Long Does It Take to Learn?
Honestly, not very long.
Most beginners can complete a clean sketch in 20 to 40 minutes after practicing a few times.
The first attempt may feel awkward.
The fifth drawing usually feels much smoother.
The tenth? You’ll probably start wondering why sleeves ever seemed difficult.
Final Thoughts
Learning how to draw a T-shirt on a wooden hanger doesn’t require years of experience or expensive supplies. It simply requires a clear process and a little patience.
By starting with the hanger, building the shirt piece by piece, adding natural folds, applying cross-hatching, and finishing with thoughtful color, you’ll create a drawing that feels balanced and realistic.
Most importantly, keep drawing. Every sketch teaches you something new, even the ones that make you laugh later. So sharpen your pencil, grab a fresh sheet of paper, and give this seven-step method a try.
Who knows? Your next T-shirt drawing might end up looking good enough to frame—or at least good enough that nobody mistakes it for a pillow anymore.