How to Draw a Takeaway Coffee Cup
Ever looked at a takeaway coffee cup and thought, “That should be easy to draw,” only to end up with something that looks like a tiny flower pot? Yep, coffee cups can pull that trick. The good news? You only need a few simple shapes and some patience to draw a takeaway coffee cup that looks clean and recognizable.
I like this drawing because it breaks a familiar object into manageable pieces. You can start with a simple cup shape, add the lid, build the sleeve, and finish with a few small details. So grab a pencil and let’s turn that imaginary coffee break into an actual drawing. ☕
What You Need to Draw a Takeaway Coffee Cup
You don’t need a fancy art kit for this tutorial. In fact, I recommend keeping things simple, especially if you’re learning how to draw everyday objects.
Here’s what I’d use:
- Pencil for the initial sketch
- Eraser for cleaning up construction lines
- Black fineliner or marker for the final outline
- Colored pencils or markers for the finished cup
- White drawing paper for a clean background
You can also skip the coloring stage if you prefer a simple black-and-white illustration. IMO, that style works especially well for beginners because you can focus on shape, proportion, and line control.
Before you start, look at the reference image for a moment. Notice how the cup uses mostly curved lines, oval shapes, and simple vertical lines. Nothing complicated hides inside this little coffee cup.
How to Draw a Takeaway Coffee Cup Step by Step
The reference uses nine simple steps. Each step adds another part of the cup, so don’t rush ahead. Why make things harder than they need to be?
Step 1: Draw the Basic Cup Shape
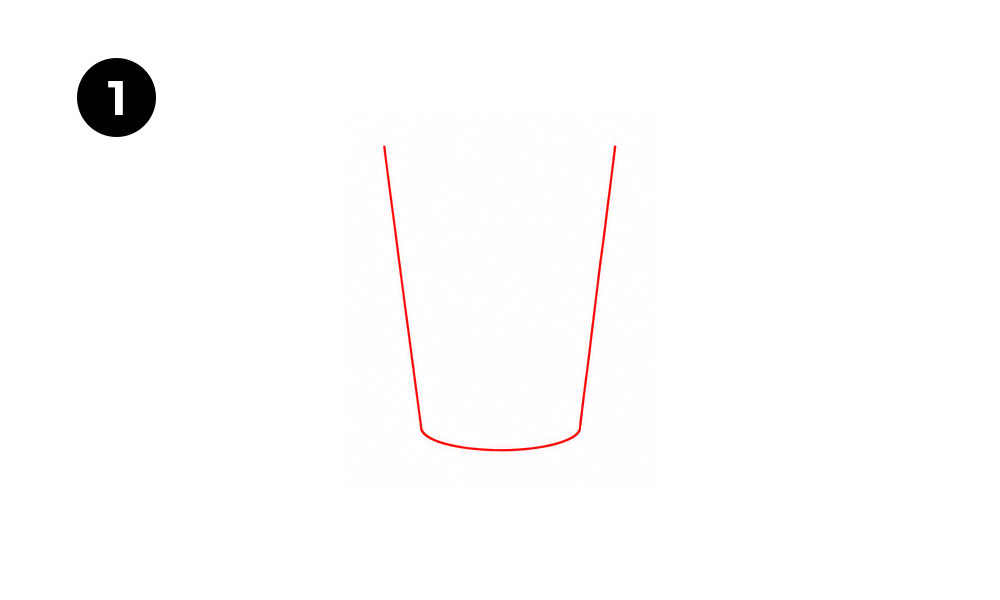
Start with the main body of the takeaway coffee cup.
Draw two slightly angled lines that move downward from left to right and right to left. Keep the top wider than the bottom because most takeaway cups have a tapered shape.
Next, connect the bottom edges with a shallow curved line. This curve gives the cup a rounded base instead of making it look like a rectangular container.
At this stage, focus on the overall shape rather than perfect lines. You can always adjust the outline later.
Try to keep both sides fairly symmetrical. If one side leans dramatically more than the other, your coffee cup might start looking like it had a rough morning.
Step 2: Add the Cup Opening
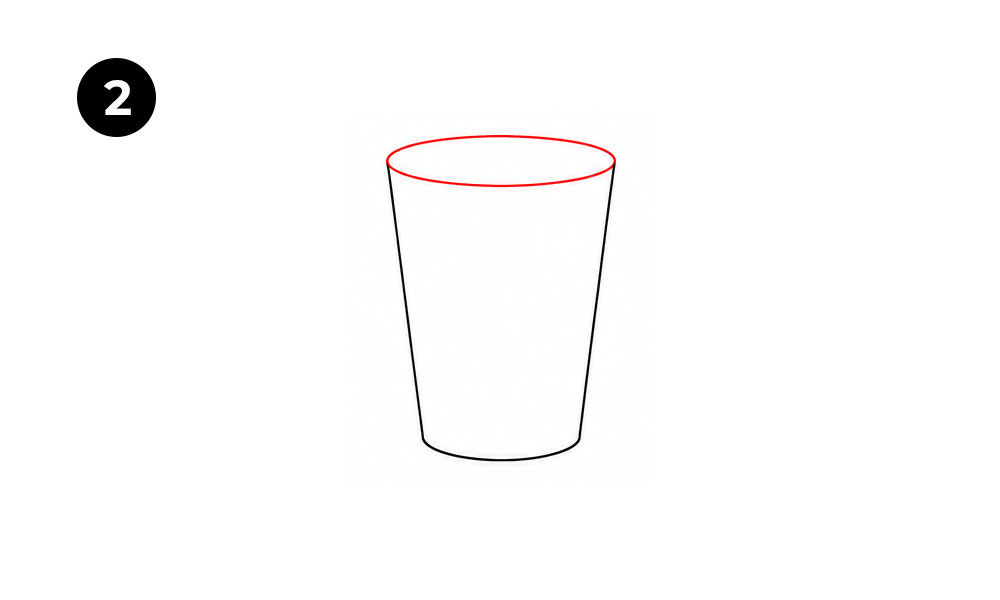
Now, draw an oval across the top of the cup.
The oval represents the opening where the lid will eventually sit. Keep the oval relatively narrow from front to back because you’re viewing the cup from a slightly elevated angle.
Make the curve smooth and light. You don’t need to press hard with your pencil yet.
Pay attention to the relationship between the oval and the cup body. The oval should match the width of the upper cup, while the bottom should remain noticeably narrower.
This simple oval also helps you establish the cup’s perspective. Ever wondered why some drawings look flat even when the outline looks correct? Small perspective details like this often make the difference.
Step 3: Draw the Lid Base
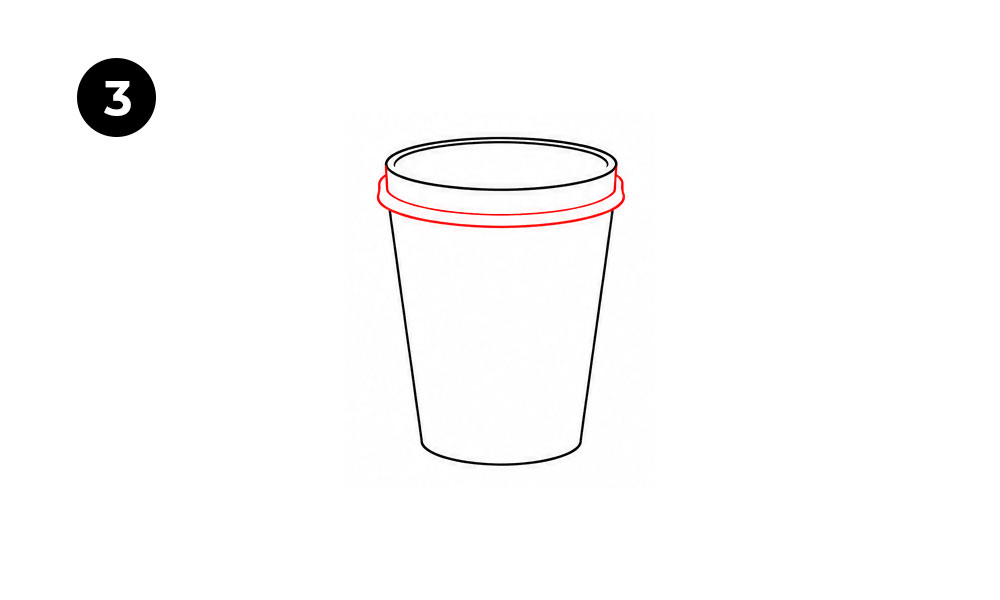
With the cup body and opening in place, start building the lid.
Add a rounded ring around the top edge of the cup. Follow the curve of the original oval so the lid looks connected to the container.
Then add another curved line underneath the lid edge. This small detail creates the impression of a lid sitting securely around the cup.
Keep your lines light while you work. You want the lid to look rounded rather than like a stack of random circles.
At this point, your drawing should clearly resemble a takeaway cup, even without the sleeve. That means you’ve already nailed the most important shapes.
Step 4: Add the Top of the Lid
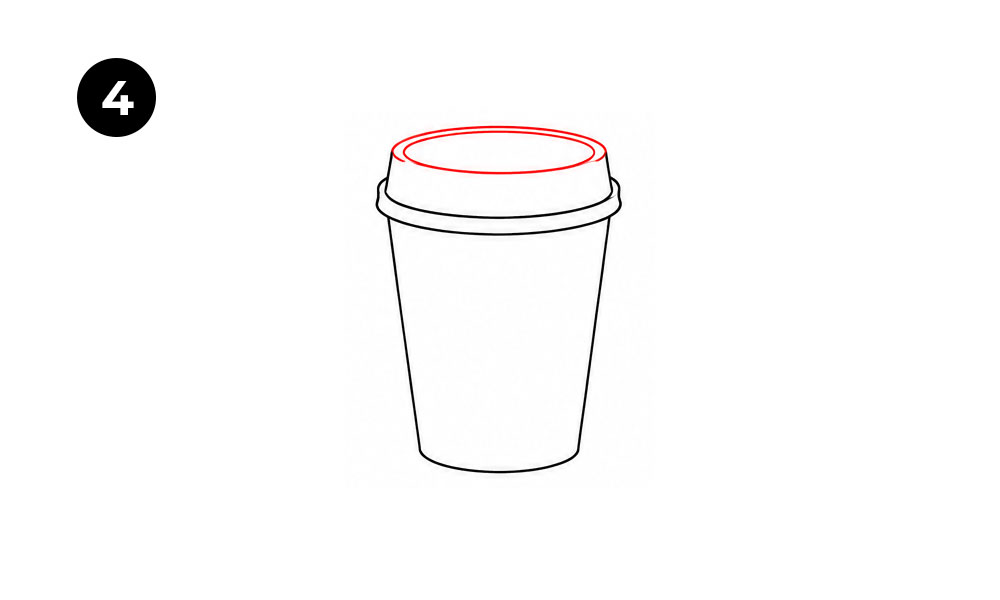
Now give the lid more structure.
Draw another oval near the top of the lid. Follow the existing curves and keep the new oval slightly smaller than the outer lid shape.
Then connect the edges with short curved lines where necessary. These details create the raised portion of the lid.
Keep the lid slightly wider than the cup opening. That small difference helps the cup look realistic.
Don’t worry about adding every tiny detail yet. When beginners try to make an object realistic too early, they often lose the basic proportions. Start simple, then build.
Step 5: Draw the Drinking Opening
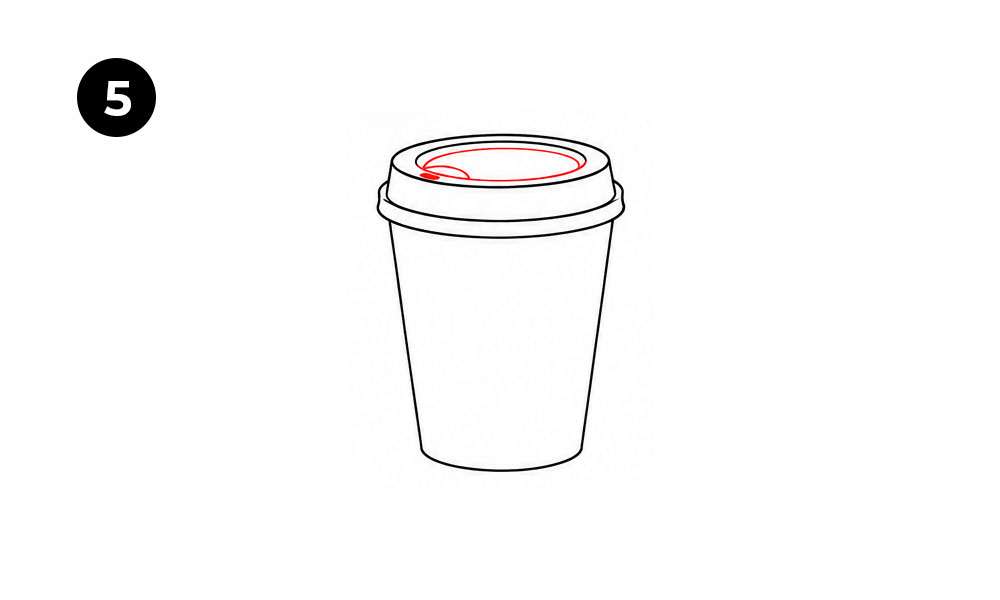
The takeaway lid needs one final feature: the small drinking opening.
Draw a narrow oval inside the top of the lid. Add a short curved or angled shape near one side to suggest the opening and its surrounding surface.
Use a light touch here because these lines should remain smaller and less dominant than the outer lid.
This step may look minor, but it gives the cup much more character. Without it, your drawing might look like a generic container with a mysterious plastic hat.
Step 6: Add the Coffee Cup Sleeve
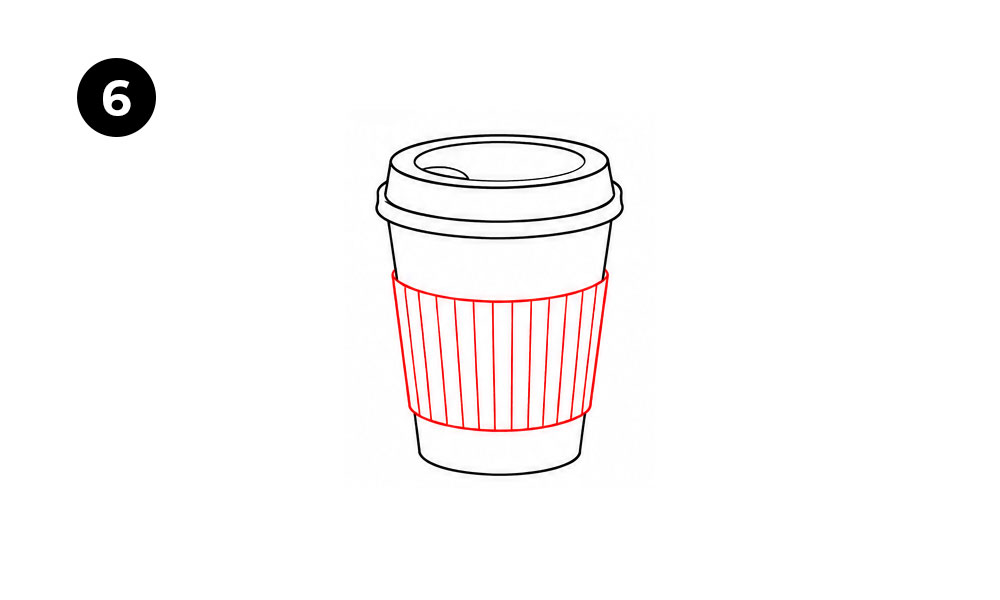
Now comes one of the most recognizable parts of the takeaway coffee cup: the sleeve.
Draw two curved horizontal boundaries around the middle of the cup. These lines should follow the natural curve of the cup rather than run perfectly straight across it.
Next, add several vertical lines between those boundaries. Space the lines fairly evenly to create the ridged texture of the cardboard sleeve.
Follow the cup’s shape when you draw the sleeve lines. Slightly curved lines can make the sleeve feel wrapped around the cup, while perfectly straight lines may make it look flat.
You can add more or fewer ridges depending on your preferred style. For a simple beginner drawing, around 8–12 vertical lines works nicely.
Step 7: Add the Bottom Rim
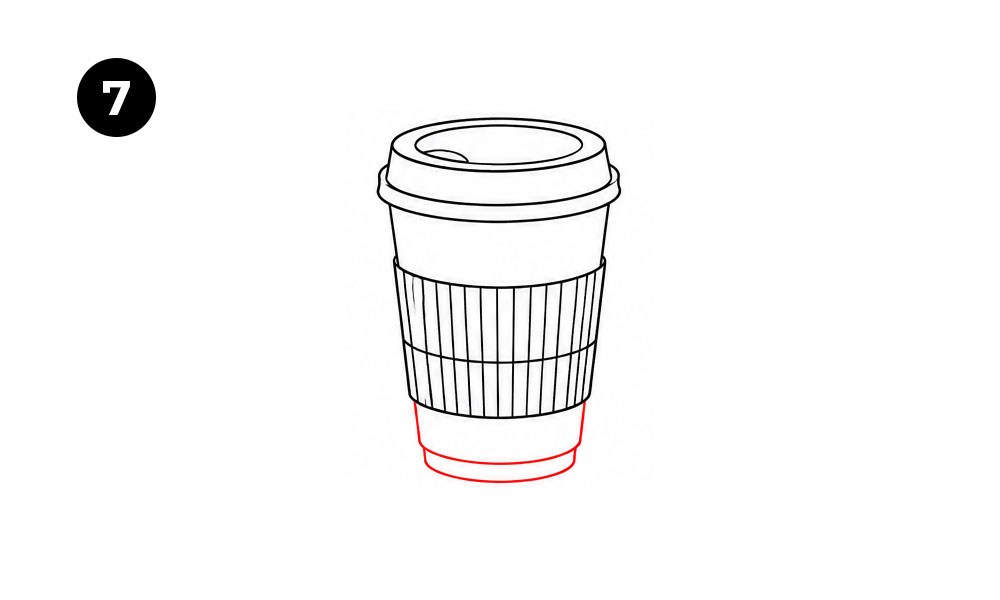
The cup still needs a little structure at the bottom.
Draw a narrow curved rim underneath the main cup body. Follow the rounded shape of the base and keep the line relatively subtle.
Then add another small curved line inside or above the bottom edge if you want more depth.
This detail might seem unnecessary, but it helps the cup sit visually on the page. Small structural details can make a simple drawing feel much more complete.
Take a quick look at your whole drawing now. Does the cup still look balanced? If one side looks wider, gently adjust the outline before moving on.
Step 8: Add the Final Cup Details
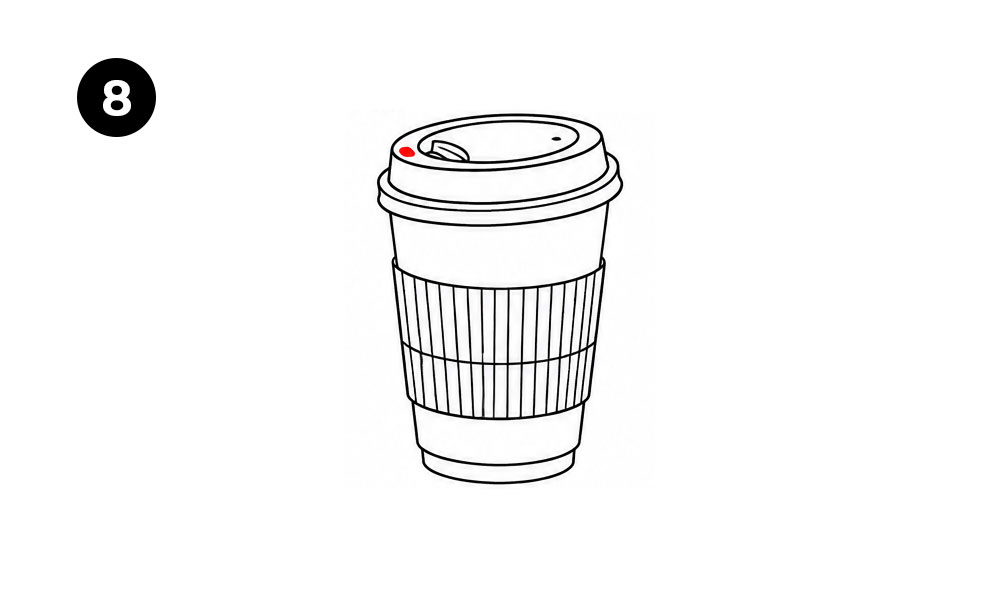
You’re almost there. Now clean up your drawing and strengthen the lines that define the finished cup.
Check the following areas:
- The outer cup outline
- The lid edges
- The drinking opening
- The sleeve ridges
- The bottom rim
- Any unnecessary construction lines
Erase light guidelines that you no longer need. Then use a fineliner or darker pencil to reinforce the important contours.
Don’t outline every single line with the same pressure. Use stronger lines for the main silhouette and lighter lines for smaller details. This simple technique can give your drawing more depth without requiring complicated shading.
Step back for a second. Does the cup look balanced? Does the lid sit naturally? Does the sleeve wrap around the body? If yes, you’re ready for the fun part.
Step 9: Color Your Takeaway Coffee Cup
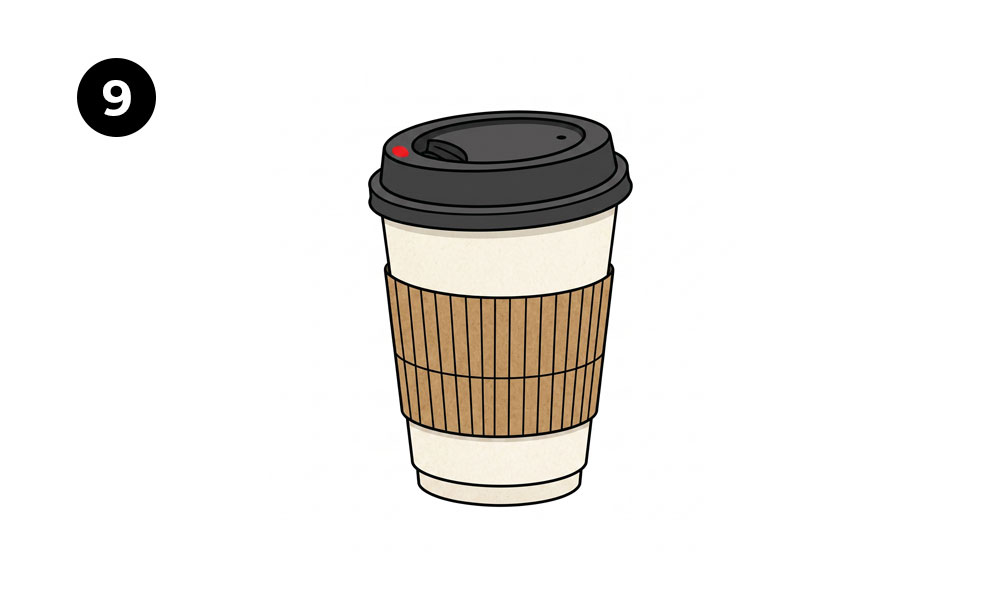
Now bring your takeaway coffee cup to life with color.
The reference image uses a warm, realistic palette with a dark lid, cream-colored cup sections, and a brown cardboard sleeve. You can follow that combination or create your own design.
Try these colors:
- Black or dark gray for the lid
- Cream or light beige for the cup
- Warm brown for the cardboard sleeve
- Light gray for subtle shadows
- Dark brown for stronger sleeve details
Apply your colors evenly at first. Then add slightly darker tones around the bottom, underneath the lid, and between the sleeve ridges.
You don’t need dramatic shading. A few carefully placed darker areas can create enough contrast to make the cup look three-dimensional.
Want a more playful result? Try a pastel pink cup, a bright blue sleeve, or a green reusable-style design. There’s no coffee police waiting outside your sketchbook. 🙂
Tips for Making Your Coffee Cup Drawing Look Better
Once you finish the basic drawing, a few small improvements can make a big difference.
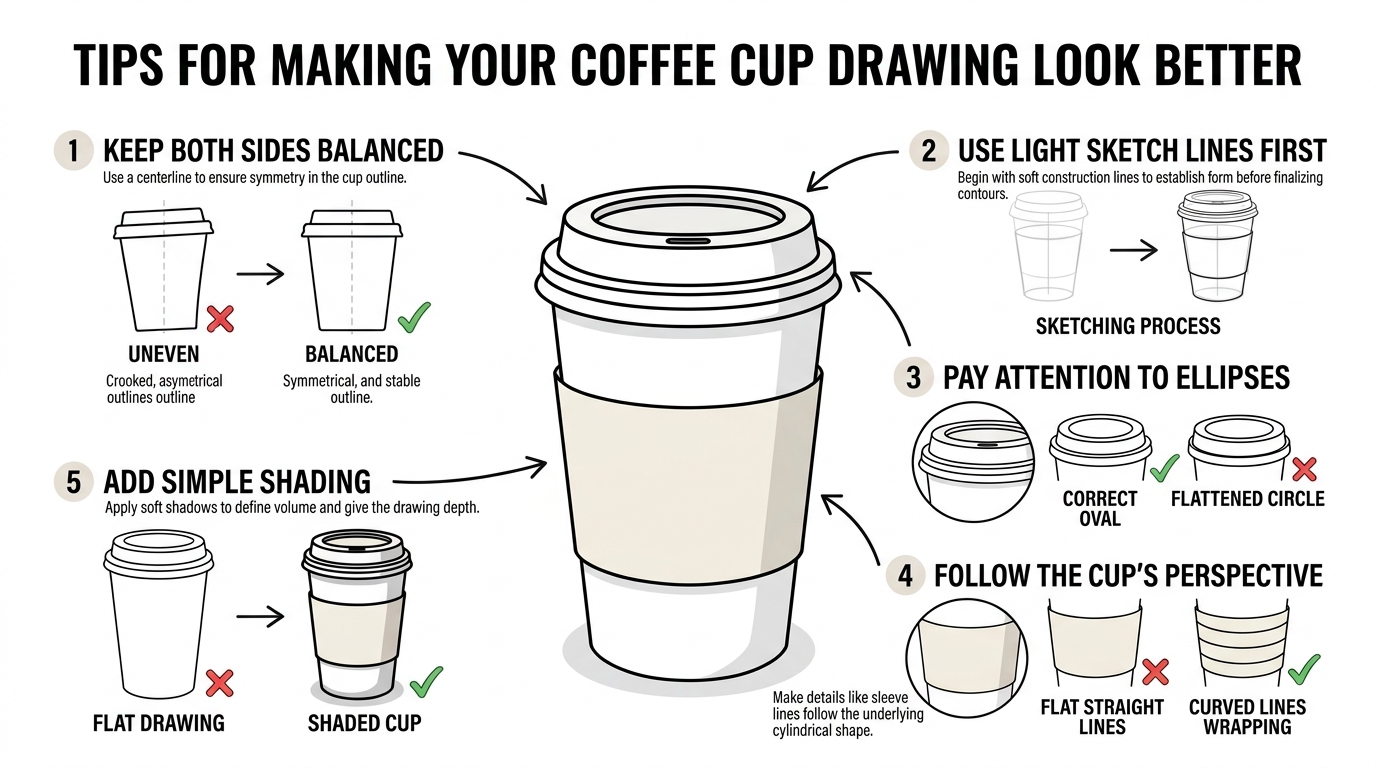
Keep Both Sides Balanced
Symmetry matters when you draw a takeaway coffee cup. Compare the left and right sides as you work.
If one side looks noticeably wider, adjust it before adding details. A balanced silhouette gives you a stronger foundation for everything else.
Use Light Sketch Lines First
Start with light pencil strokes instead of dark lines.
This approach lets you correct proportions without leaving heavy marks behind. Once you feel happy with the shape, reinforce the final outline.
FYI, you don’t need to erase every tiny pencil mark. A little sketch texture can actually give an illustration more personality.
Pay Attention to Ellipses
The top of the cup, lid, and drinking opening all use oval shapes.
Try to keep these curves consistent. If one oval becomes extremely flat while another becomes very round, the perspective can feel strange.
Practice drawing a few simple ellipses on scrap paper before you start. Five minutes of warm-up can save you plenty of erasing later.
Follow the Cup’s Perspective
The sleeve should wrap around the cup rather than float across it.
Curve the horizontal sleeve boundaries slightly and keep the vertical ridges aligned with the cup’s tapered body. These small adjustments create a stronger sense of volume.
Add Simple Shading
You can create depth without turning your drawing into a complicated realism exercise.
Try adding darker shading:
- Under the lid
- Along one side of the cup
- Between sleeve ridges
- Around the bottom rim
- Inside the drinking opening
Keep the opposite areas lighter. Simple contrast can make your coffee cup pop off the page.
Common Mistakes When Drawing a Takeaway Coffee Cup
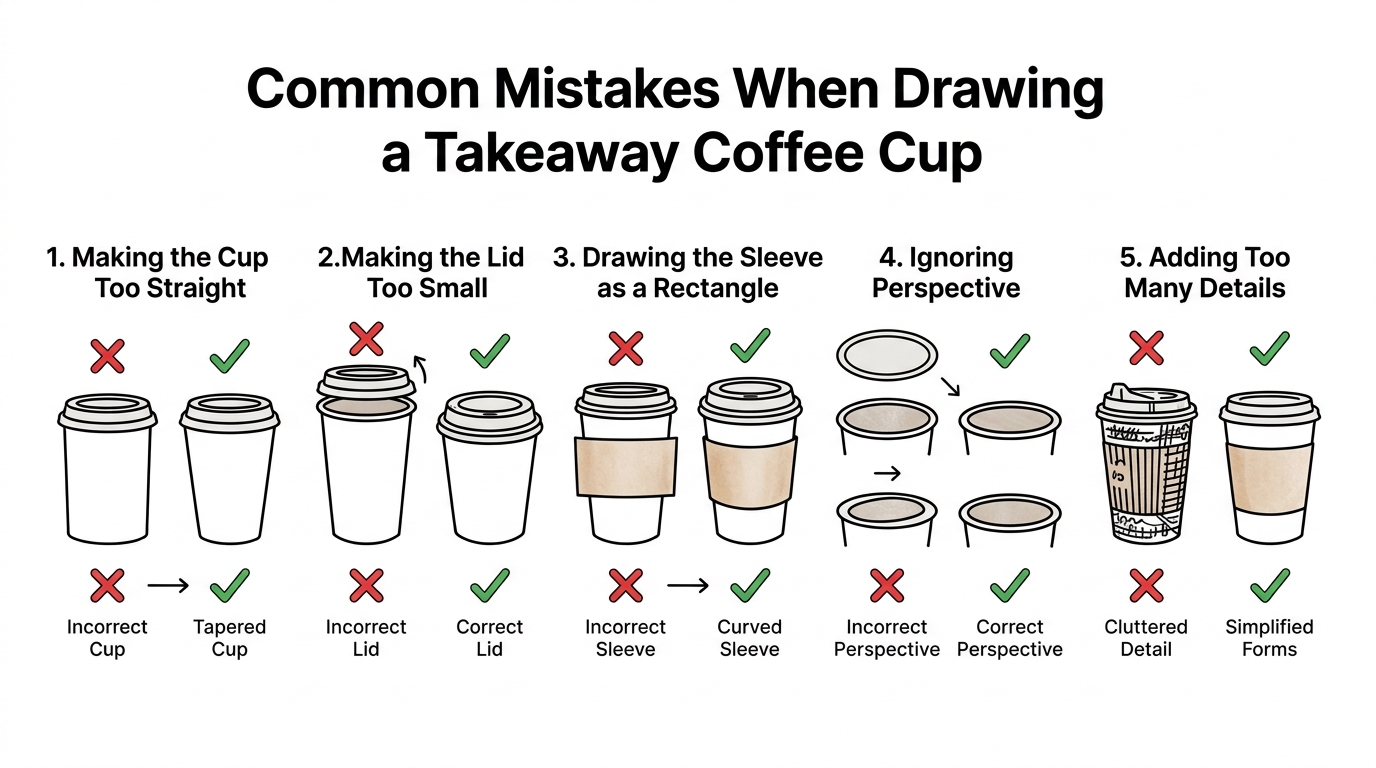
Even simple drawings come with a few traps. Luckily, most of them have easy fixes.
Making the Cup Too Straight
Many beginners draw the sides almost vertically. That shape can make the cup look like a glass or a can.
Instead, taper the body slightly toward the bottom. The wider top instantly creates a more recognizable takeaway-cup shape.
Making the Lid Too Small
A tiny lid can make the whole cup look disproportionate.
Remember that the lid usually extends slightly beyond the cup body. Give it enough width to create a clear overhanging edge.
Drawing the Sleeve as a Rectangle
A rectangular sleeve can look pasted onto the cup.
Instead, follow the cup’s curve when you draw the sleeve. Let the upper and lower edges bend gently around the body.
Adding Too Many Details
More detail doesn’t always mean a better drawing.
If you add dozens of tiny lines, logos, textures, and shadows, you can lose the clean shape that makes the illustration appealing. Start with the essential forms and add details only when they improve the drawing.
Why This Drawing Works Well for Beginners
A takeaway coffee cup makes a great beginner drawing subject because it combines several useful drawing skills in one small project.
You practice:
- Basic shapes through ovals and curved forms
- Perspective through the visible cup opening
- Proportion through the tapered body
- Line control through the lid and sleeve
- Texture through the cardboard ridges
- Shading through simple light and dark areas
- Coloring through the final step
You also learn how artists break complicated-looking objects into smaller shapes. That skill can help you draw mugs, bottles, food containers, cans, and plenty of other everyday objects.
Final Thoughts
Learning how to draw a takeaway coffee cup doesn’t require complicated techniques. Start with the tapered cup body, add the opening, build the lid, create the drinking hole, and finish with the textured sleeve and bottom rim.
The key comes down to simple shapes, balanced proportions, clean lines, and a little patience. Don’t worry if your first attempt looks slightly wonky. That’s part of learning, and honestly, even wonky coffee cups have personality.
Try drawing the same cup again after a few days. You might surprise yourself with how much easier the shapes feel the second time.
So, grab your pencil, follow the nine steps, and give it another shot. Who knows? Your next coffee break might come with a sketchbook instead of a screen.