How To Draw a Hotdog
Want to learn how to draw a hotdog without turning your sketchbook into a crime scene? Good news: you only need a few simple shapes, some confident lines, and a little patience.
I love food drawings because they let you practice basic forms while creating something instantly recognizable.
A hotdog works especially well for beginners because the drawing combines curved lines, simple shapes, and a few small details.
Follow the six steps below, and you’ll have a cheerful little hotdog ready for your sketchbook, coloring page, craft project, or digital design. 🌭
What You Need to Draw a Hotdog
You don’t need a fancy art kit for this tutorial. Grab a few basic supplies and let’s get started.
Here’s what I recommend:
- Pencil for your initial sketch
- Eraser for cleaning up construction lines
- Black pen or fine-tip marker for your final outline
- Colored pencils, crayons, or markers for coloring
- White drawing paper or your favorite sketchbook
If you plan to color your hotdog, keep your outline fairly clean and even. You can also skip the pencil and draw directly with a pen if you enjoy living dangerously.
IMO, beginners should stick with pencil first because small corrections can save a lot of frustration.
How To Draw a Hotdog Step by Step
The attached guide breaks the drawing into six simple steps. Each step adds another part of the hotdog, so you never need to tackle the whole drawing at once.
The trick involves starting with the bun, adding the sausage, refining the ends, and then adding a few details before coloring. Sound manageable? Let’s draw it.
Step 1: Draw the Top Curve of the Bun
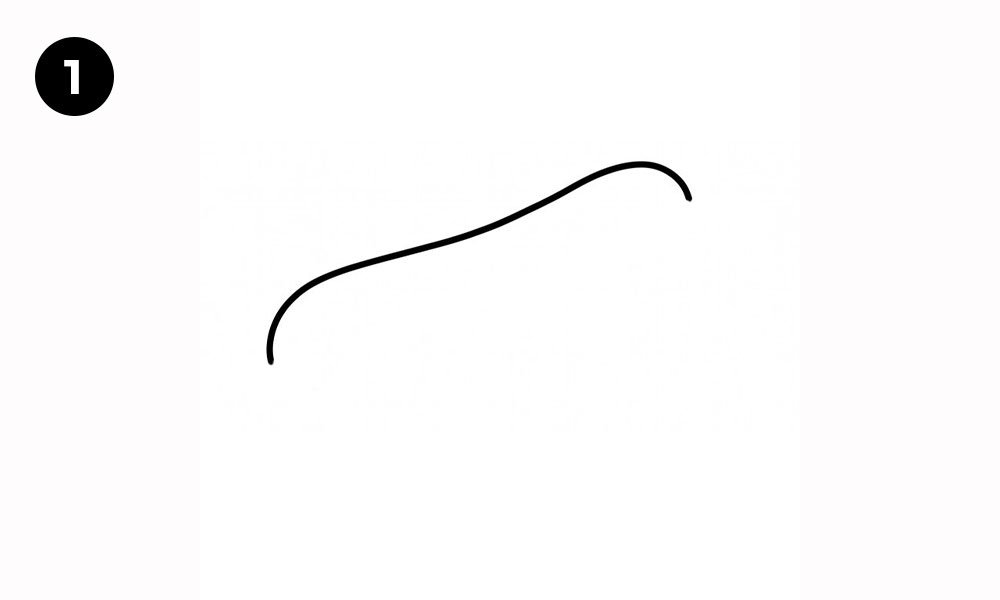
Start with the upper edge of the hotdog bun.
Look at the first step in the guide. Draw one long, slightly curved line across the page. Start toward the left, curve the line gently upward through the middle, and bring it down slightly toward the right.
Don’t worry about creating a perfect mathematical curve. Real hotdog buns don’t come with rulers attached, thankfully.
Keep your line light if you use a pencil. You can always darken it later when you finish the drawing.
Focus on the Shape
Think of this first line as the basic direction of the bun. You want a long, soft curve rather than a straight horizontal line.
Try these tips:
- Start with a gentle curve.
- Keep the line relatively smooth.
- Leave plenty of space underneath for the rest of the hotdog.
- Avoid making the curve too sharp.
- Use light pencil pressure at first.
Why start with only one line? This approach gives you a simple guide for the entire drawing. You can build everything else around it.
Step 2: Complete the Basic Bun Shape
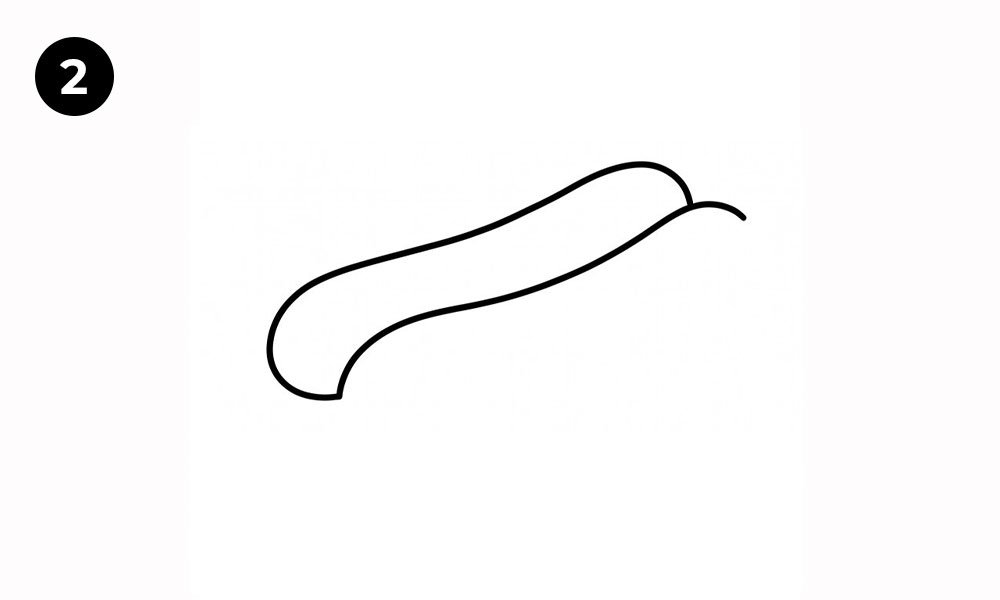
Now let’s turn that single curve into something that actually resembles a bun.
In step two, draw a second curved line beneath the first one. Follow the general direction of the upper line, but create a little more space between the two curves.
At the left end, curve the lower line around to create the rounded end of the bun. Then guide the line toward the right and curve it upward near the other end.
You should now see the basic long, rounded shape of the hotdog bun.
Keep Your Curves Natural
This step matters because the bun creates the overall structure of your drawing. If you make the lines too straight, your hotdog might look more like a strange sandwich or a tiny canoe. Nobody ordered a canoe.
Instead, aim for:
- A long oval-like form
- Rounded ends
- A slightly uneven, natural curve
- Enough room in the center for the sausage
Don’t erase every tiny wobble. A hand-drawn illustration should still look hand-drawn.
Step 3: Add the Sausage
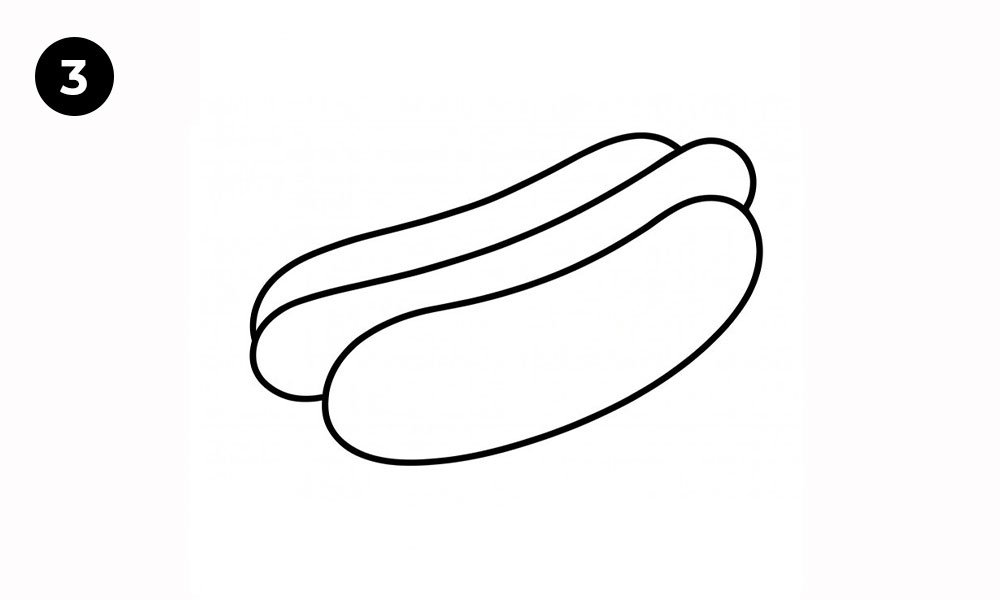
Now comes the fun part: add the hotdog sausage inside the bun.
Look at step three. Draw a long, rounded shape that follows the opening of the bun. Start near the left side and curve the sausage through the center toward the right.
The sausage should sit inside the bun rather than float above it.
Pay attention to the ends. The sausage curves around at the right side, while the left end remains rounded and visible.
Create Depth With Overlapping Shapes
This step teaches a useful drawing trick: overlapping shapes create depth.
The bun sits around the sausage, so you don’t need complicated perspective lines. Instead, let the sausage overlap naturally with the bun.
Ask yourself: where does the sausage sit in relation to the bread?
The answer should guide your lines.
If you struggle with proportions, don’t restart immediately. Compare the sausage length with the bun length and adjust your pencil lines gradually. FYI, small imperfections often disappear once you add the final details and color.
Step 4: Add the Left End Detail
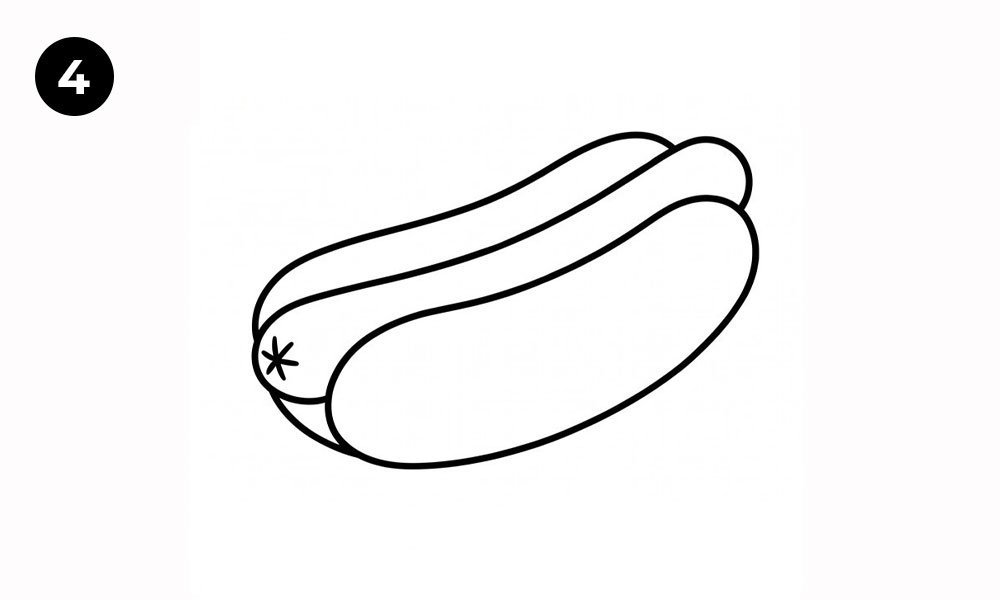
Your hotdog already looks recognizable, but step four gives it more personality.
Focus on the left end of the bun and sausage. Add the curved lines that help define the opening of the bun. Then draw the small star-like detail shown in the reference image near the left end.
That tiny mark might seem insignificant, but it gives the end of the hotdog more texture and definition.
Why Small Details Matter
Beginners sometimes think they need dozens of details to make a drawing interesting. You really don’t.
A few carefully placed marks can communicate texture much better than covering the entire drawing with random lines.
For this hotdog drawing, concentrate on:
- The rounded left end
- The separation between bun and sausage
- The small star-shaped mark
- The overlapping curves
Keep the details small and controlled. Your hotdog doesn’t need a detailed autobiography.
Step 5: Add the Sausage Texture
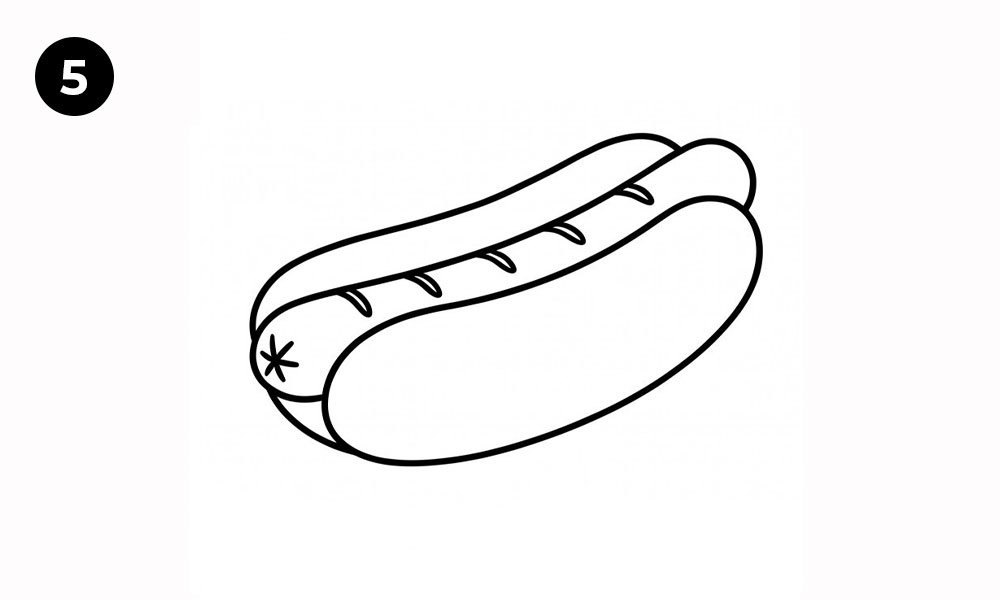
Now your drawing needs one final line-art upgrade.
In step five, add several short curved marks across the sausage. These marks follow the shape of the sausage and create the impression of grill marks or texture.
Space the marks along the length of the sausage. Keep them fairly short and slightly curved instead of making them perfectly straight.
Make the Details Follow the Form
Here’s a simple trick that can improve your drawing immediately: curve your detail lines along the object.
When you draw marks across a rounded object, straight lines can make the object look flat. Curved marks help suggest volume.
You can also vary the spacing slightly. Handmade drawings rarely need perfect symmetry.
At this stage, step back and look at your entire sketch.
Does the bun look rounded?
Does the sausage sit comfortably inside it?
Do the ends connect naturally?
If something looks slightly off, use your eraser gently and make a small adjustment.
Step 6: Outline and Color Your Hotdog
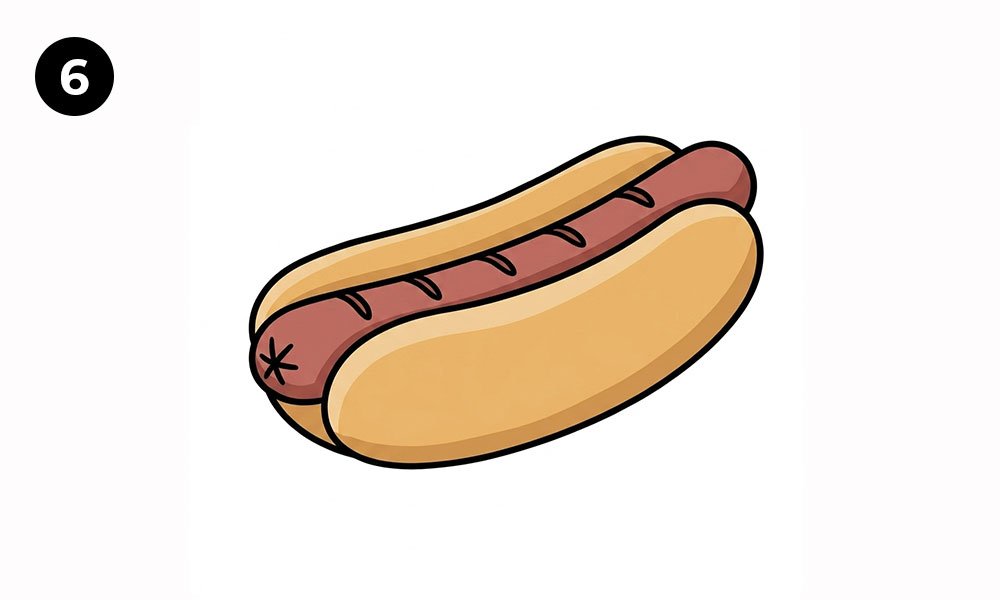
You made it!
The sixth step shows the finished, colored hotdog. Now you can turn your pencil sketch into a bright food illustration.
Start by tracing your best lines with a black fine-tip pen or marker. Let the ink dry completely before you erase any remaining pencil marks.
Once you clean up the sketch, add your colors.
The example uses warm, appetizing colors:
- Golden yellow and tan for the bun
- Pinkish red or reddish brown for the sausage
- Dark brown or black for the outline
- Slightly darker shades for shadows and texture
You don’t have to copy those colors exactly. Try mustard yellow, deeper brown, orange, or even a silly rainbow hotdog if that matches your mood.
Add Simple Shading
Want to make your hotdog look more three-dimensional?
Add a slightly darker shade along the lower edge of the bun and around the areas where the sausage meets the bread.
Keep the lighter color toward the center of each shape. This simple light-and-dark contrast can create a surprising amount of depth.
You can also add a few darker areas around the ends and underneath the sausage.
Don’t overdo it. Too much shading can hide your clean line art, especially in a beginner-friendly drawing.
Easy Tips for a Better Hotdog Drawing
Once you finish your first attempt, you might want to improve the next one. A few small habits can make a big difference.
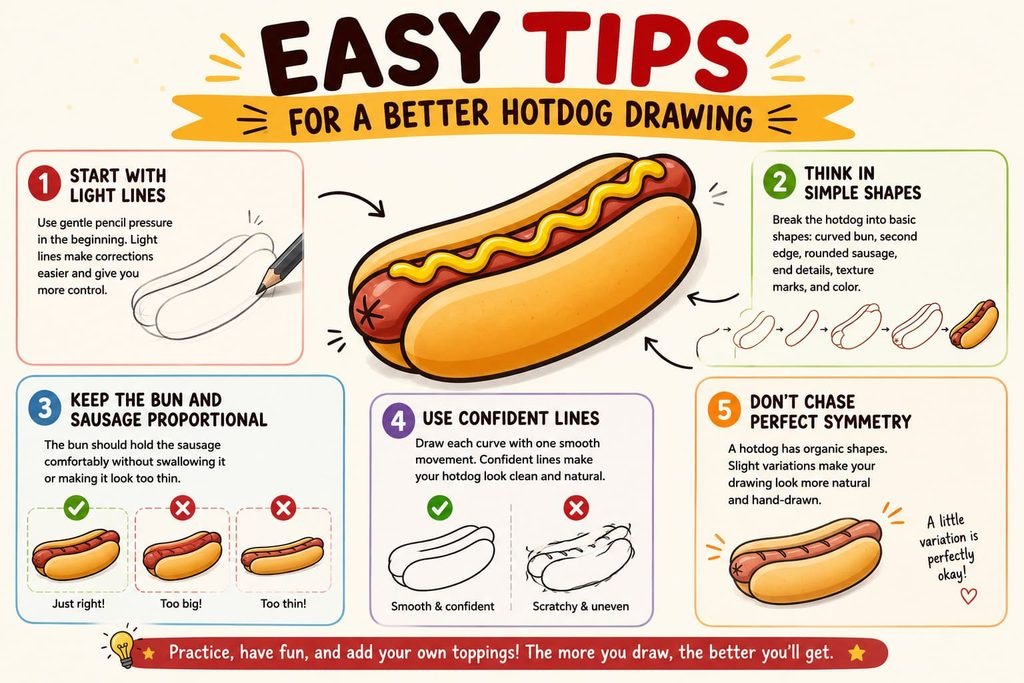
1. Start With Light Lines
Use gentle pencil pressure during the first few steps. Light lines make corrections much easier.
Once you feel happy with the proportions, strengthen the final outline.
2. Think in Simple Shapes
Instead of thinking, “I need to draw an entire hotdog,” break the subject into parts:
- Curved bun
- Second bun edge
- Rounded sausage
- End details
- Texture marks
- Color and shading
Suddenly, the drawing feels much less intimidating.
3. Keep the Bun and Sausage Proportional
The bun should provide enough space for the sausage without swallowing it completely.
If your sausage looks enormous compared with the bread, reduce its height. If it looks too skinny, make the shape slightly fuller.
4. Use Confident Lines
Once you understand the shape, try drawing each curve with one smooth movement.
Repeatedly scratching over the same line can make the outline look messy. Take a breath, look at the direction of the curve, and draw it.
5. Don’t Chase Perfect Symmetry
A hotdog has an organic shape. You don’t need identical curves on both sides.
In fact, a little variation can make your illustration feel more natural.
How To Make Your Hotdog Drawing More Fun
Once you know how to draw a hotdog, you can customize the design in all kinds of ways.
Try adding:
- Mustard zigzags
- Ketchup lines
- Relish
- Sesame seeds on the bun
- Small grill marks
- Extra shading
- A plate underneath
- A napkin beside the hotdog
- French fries nearby
- A simple picnic table background
You can also experiment with different perspectives.
Draw one hotdog from the side, another from a slightly higher angle, or create a plate containing several hotdogs. Why stop at one when your imaginary cookout needs a whole tray?
Common Mistakes Beginners Make
Even simple drawings can create a few headaches. Luckily, you can avoid most of them.
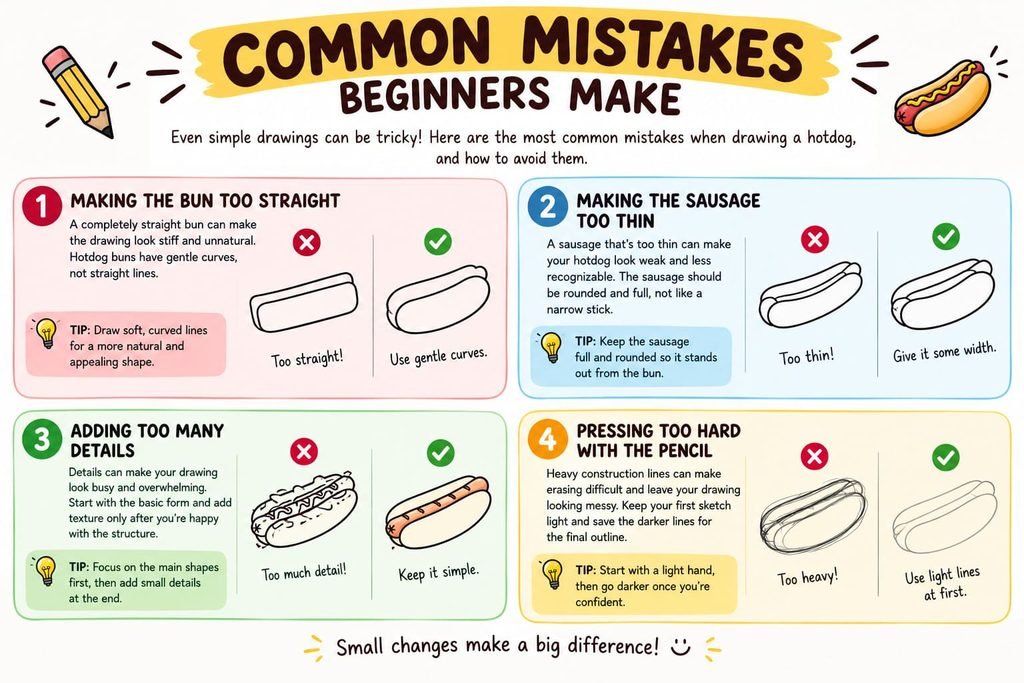
Making the Bun Too Straight
A completely straight bun can make the drawing look stiff. Use gentle curves to create a softer shape.
Making the Sausage Too Thin
Give the sausage enough width so it stands out from the bun. The sausage should look rounded rather than like a narrow stick.
Adding Too Many Details
Details should support the drawing, not overwhelm it. Start with the basic form and add texture only after you feel happy with the structure.
Pressing Too Hard With the Pencil
Heavy construction lines can make erasing difficult. Keep your first sketch light and save the darker lines for the final outline.
Practice Makes Your Drawings Better
Your first hotdog might not look exactly like the example. That’s completely fine.
Try drawing it again without looking closely at every step. Then try a smaller version. After that, change the angle or add your favorite toppings.
Each attempt helps you understand the shapes more naturally.
I especially recommend drawing the same subject several times on one page. Make one hotdog skinny, one chunky, one slightly tilted, and one extra silly. You’ll quickly notice which lines feel easier and which shapes need more practice.
Final Thoughts on How To Draw a Hotdog
Learning how to draw a hotdog doesn’t require complicated techniques. Start with the long curved bun, build the second edge, add the rounded sausage, define the ends, add a few texture marks, and finish with color.
The six-step method keeps the process simple and gives you plenty of room to practice. Focus on smooth curves, simple shapes, clean outlines, and basic shading, and you’ll create a fun hotdog illustration without unnecessary complexity.
So grab your pencil and give it a try. And if your first hotdog looks a little wonky, don’t worry—it probably just needs more ketchup. 🌭